The Defect List is used to record the number of specific defects found on inspected items.
|
Contents [Hide] |
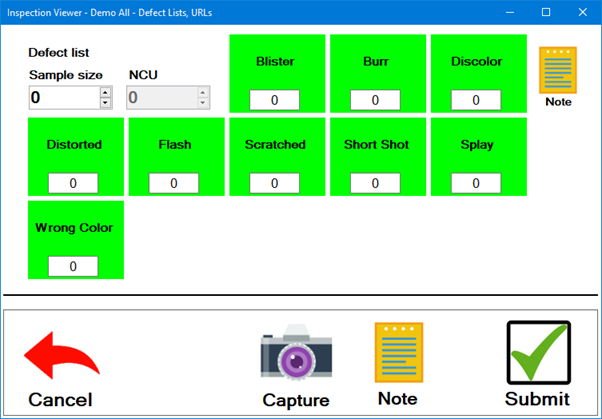
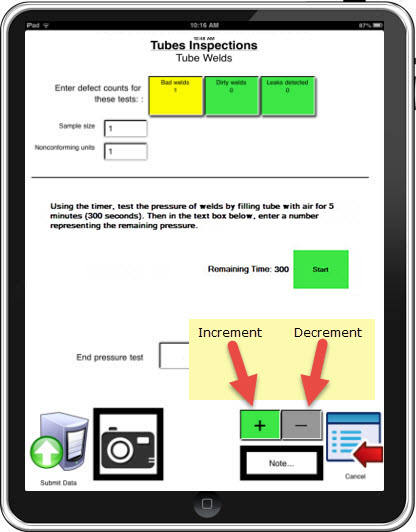
The Defect List test displays similarly on a PC and on a mobile device. The example shown below is of a PC Collect inspection.

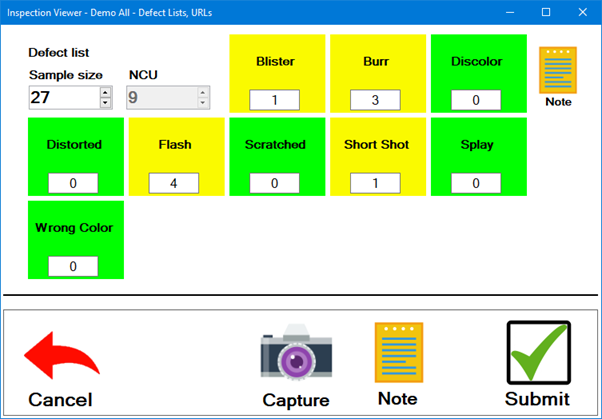
The Inspector enters the number of each defect in the defect boxes (or touches the defect buttons to increment the defect counts).

Various defects can be associated with part numbers that undergo specific processes. For example the defect "blistered paint" might be associated with a part number that undergoes a painting process.
If you are entering data for a sample that has no defects, you can proceed to entering Sample Size and NCU.
If the defect buttons show number fields like the examples above, you can specify the number of times each defect was found in the sample:
Click a defect button to add 1 to the count for that defect by 1, or right-click the defect button to subtract 1 from its count.
Click a defect button and then type its count. If desired, you can press the TAB key to move across the defect buttons and continue typing their counts. After you have reached the last defect button, pressing TAB will move to the next test.
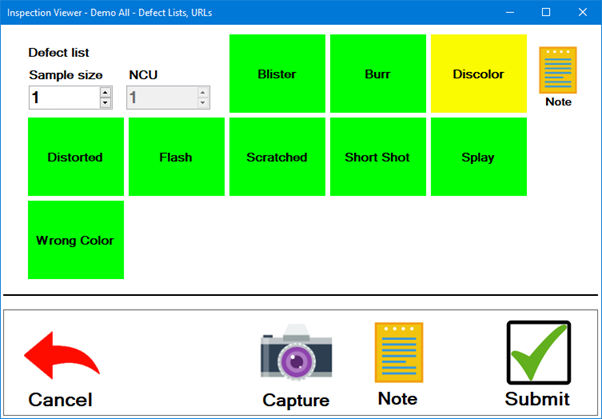
If the defect buttons do not show number fields, like the example below, then you can:
Click a defect button to set its count to 1, or click the same defect to set its count back to 0.
Press the TAB key to move across the defect buttons and then press the Spacebar to select the current defect (set its count to 1) or to de-select the current defect (set its count back to 0). After you have reached the last defect button, pressing TAB will move to the next test.
Depending how this test was configured, you may be able to select multiple defects, or you may be limited to a single defect.

-or-

The Sample size is the number of units actually inspected.
The method you use for entering Sample size depends on how this test is configured and how your organization collects data. Options may include:
If you have already counted the number of units being inspected, click in the Sample size box and type the number.
(PC Collect only) If you count the units as you inspect them, you can increase the Sample size by 1 each time you inspect another unit, then enter the defects for that unit. Ways to increase the Sample size by 1 include:
click the  button for the Sample
size box
click the Sample size box and then press the Up Arrow key
click the Sample size box and then rotate the scroll wheel on your mouse
If the Sample size box is unavailable, like the example shown below, then you cannot change this value.

The NCU (Nonconforming Units) is the number of units that were found with defects.
The method you use for entering NCU depends on how this test is configured and how your organization collects data. Options may include:
If you have already counted the number of units that are defective, click in the NCU box and type the number.
(PC Collect only) If you count the nonconforming units as you find them, you can increase the NCU by 1 each time you inspect another defective unit. Ways to increase the NCU by 1 include:
click the  button for the NCU
box
click the NCU box and then press the Up Arrow key
click the NCU box and then rotate the scroll wheel on your mouse
If the NCU box is unavailable, like the example shown below, then you cannot change this value.
