GagePort data entry allows you to enter data automatically from up to 32 GagePorts.
A GagePort is usually configured with 1, 2, 4, or 8 ports. Multiple GagePorts can be stacked together in a backplane, and multiple backplanes can also be stacked together for a maximum of 32 ports on the system. When mixing different types of GagePorts in one or more backplanes, the GagePorts containing the lowest number of ports must be placed at the bottom of the stack. For more information, please review the reference manual for your GagePort.
![]() Before you can perform GagePort data entry at any workstation, you must run the Set Up GagePort.INI module one time at this workstation. Running the Set Up GagePort.INI module creates a GagePort.INI file in your C:\Windows folder.
Before you can perform GagePort data entry at any workstation, you must run the Set Up GagePort.INI module one time at this workstation. Running the Set Up GagePort.INI module creates a GagePort.INI file in your C:\Windows folder.
In setting up the GagePort, you may need to disassemble the hood of the GagePort power cable in order to set the dipswitches.
Set dipswitches 1 and 6 to “On” and dipswitches 2-5 to “Off.” In the Set Up GagePort.INI module, set the parameters to 9600 baud, 7 data bits, no parity, and 2 stop bits.
If you set dipswitch 1 to “On” and dipswitches 2-6 to “Off,” your parameters should be 9600 baud, 8 data bits, no parity, and 1 stop bit.
Click OK.
![]() After setting up the GagePort.INI, you can create your GagePort template. To enter data from a GagePort, click on the cell where you want to read data from the GagePort then click the GagePort icon.
After setting up the GagePort.INI, you can create your GagePort template. To enter data from a GagePort, click on the cell where you want to read data from the GagePort then click the GagePort icon.
You should select the GagePort file to be used for this template. When you set up a GagePort file for one cell, the program automatically sets up all your GagePorts with the same file. If you change the file in another cell, it will change all cells in this template.
Click on Select and highlight the file you want. Click on Set.

For the Port, select the port on the GagePort from which you want this data point to come.
When you select a GagePort file and port number, the dialog box allows you to specify that this port will be used in dynamic mode. By clicking in the “On” box, you will be able to select the measurement you want to record. To record the low measurement, select GPLOW, for the high measurement, select GPHIGH, and for the range between the low and high measurements, select GPTIR.
When you click on “Trigger reading,” you can start and stop a dynamic reading at this cell.
If you have several dynamic gages on a GagePort, you may want to start and stop the dynamic reading on one gage at a time. To do this, select “Dynamic mode” for each GagePort cell in templates that will read from a dynamic gage, and select “Trigger reading” for each of these cells.
If you have several dynamic gages on a GagePort and you want to start and stop the dynamic reading on all of these gages at the same time, first select “Dynamic mode” for each GagePort cell in the template that will read from a dynamic gage. Then select “Trigger reading” on the first GagePort cell that the operator will access during the data entry session. This is usually the left-most, top-most GagePort cell.
Click on New for a new file.
![]() Note: If you attempt to use the GagePort device driver in both Data Entry and Data Entry Designer, you will get an error message. You do not need to exit the other application. In Data Entry, you will need to close the current template. In Data Entry Designer, you will need to exit from the GagePort setup screens and return to the dialog that displays the list of available GagePort setup files.
Note: If you attempt to use the GagePort device driver in both Data Entry and Data Entry Designer, you will get an error message. You do not need to exit the other application. In Data Entry, you will need to close the current template. In Data Entry Designer, you will need to exit from the GagePort setup screens and return to the dialog that displays the list of available GagePort setup files.
Click on Ports if you want a different number of ports. You can have up to 32 ports. The program assumes you want four. Determining the number of ports on the GagePort determines the number of ports available for you to set up.
Enter the number of ports you want to use and click OK.
To set up a footswitch, click on Footswitch to display the following dialog:
Tip: Using a footswitch may be slower than using the read button on the gauge or on the computer.
Click OK when you finish setting up your footswitch.
Now you are ready to set up each port for your GagePorts.
Click the numbered button for each GagePort. For example, click on 1 to set up the first port.
Choose the read option you want. You can choose to take a reading by pressing the read button on the gauge, by pressing the footswitch, by pressing the “Read” button or the spacebar on the computer, or by forcing a reading from the computer.
Select your GagePort model from the list.
We recommend that you always choose to automatically detect the gauge type. If you clear this box, you will get a list of options, and you will need to highlight the gauge of your choice.
Or you can click Reset GagePort. This flashes the lights on the GagePort and makes sure you have a good connection between your computer and the GagePort. Click OK when you finish resetting the GagePort.
Follow this procedure for each port that you need to set up. When you finish setting up all your ports, click OK to return to the Select GagePort file dialog box.
You should take some test readings before you save your file to make sure that you are able to read with the GagePort. If you cannot read in the values here, you will not be able to read them in during a data entry session.
To take a test reading:
|
If the Port looks like this: |
The GagePort is triggered by: |
Perform these steps to take a test reading: |
|
|
Read button on gage |
Click the |
|
|
Footswitch |
Click the |
|
|
Read button on computer |
Click the |
|
|
Computer forces reading |
Click the |
The readings from the Gage should be displayed in the Value cells.
If you cannot get a reading, check the following:
the setting for each Port in the GagePort definition file
the batteries in the Gage
the connection to the power supply
the communication parameters in the GagePort.INI
If you need to have a value entered in a GagePort cell to perform a calculation on it, use the FIELD 1 or COL_N 1 commands to specify the value entered from the Gage. For example, a formula line for a GagePort cell might be (FIELD 1-0.25)/0.25 in which FIELD 1 accesses the value that was just entered through the GagePort.
After setting your GagePort file, the program will prompt you to save it.
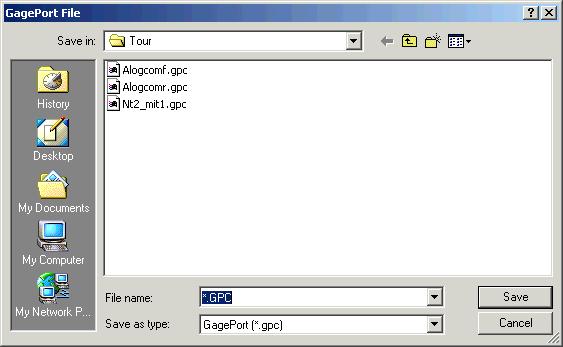
Enter an appropriate file name with the extension (. gpc) and then click OK.
Click Set to set the file of your choice for this GagePort data entry template.
Back at the first GagePort screen, click the down arrow to select the GagePort number that you want to use to enter data in this cell.