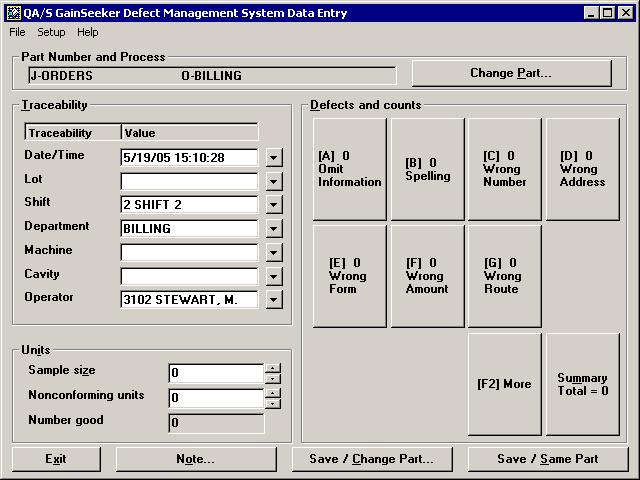
If you are not using a bar code reader to enter data into DMS, you can choose to display defect buttons instead of the typical defect list.
If you are entering data via a touchscreen, or if you are entering data with a keyboard but no pointing device, this screen layout can make it much easier to enter defect data than the traditional layout of this screen.

To display the defect buttons:
Log in to the DMS Data Entry module as a user or group name with access rights to the Setup menu.
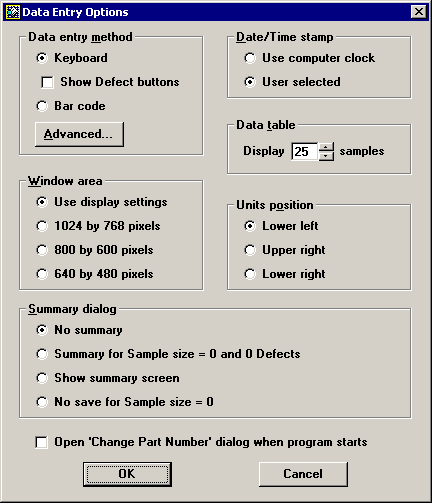
Click the Setup menu and then click Data Entry Options. This displays the Data Entry Options screen.

In the Data entry method area, select the Show Defect buttons check box. Then click OK.
To enter one defect at a time:
If a pointing device is not available, press the F2 key to highlight the [F2] More button.
Click the defect found, or type the letter referenced between square brackets. The count for that defect is incremented each time you click the button or type its letter.
For example, to enter two Spelling defects, click the Spelling button twice or press the B key twice.
The count on this button is incremented from 0 to 2.

To enter a count for each defect:
If a pointing device is not available, press the F2 key to highlight the [F2] More button.
Type the count for a defect.
Click the defect found, or type the letter referenced between square brackets. The overall count for that defect is incremented by the number you entered.
For example, to enter five Wrong Route defects, first press the 5 key. Then click the Wrong Route button or press the G key.
The count on this button is incremented from 0 to 5.

|
|
More: