Choosing a date range for the monitor

Note: This topic contains information about the legacy SPC Database Monitor module, which is being phased out from GainSeeker Suite. It is still available for use, but is being replaced by the Monitor Table chart window in the newer GainSeeker Charts module.
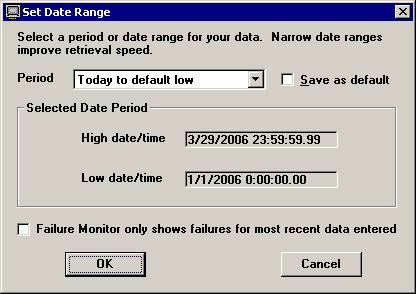
You can limit the data displayed in the monitor according to date and time stamp:

  1. Click the Options menu (or Opts in PDA mode on very small displays), and then click Period. This will display the Set Date Range screen:

  2. Select a date range from the Period list.

    To manually specify the high and low dates and times, select Custom by period or Custom by date from the Period list. (In PDA mode on very small displays, these Custom options are not available.) Then enter the appropriate High date/time and Low date/time.

  3. To configure your workstation to always use this period for monitor windows (and the Failure Monitor only shows failures for most recent data entered check box setting) by default, select the Save as default check box.

  4. Click OK to apply your changes or Cancel to undo your changes.


More:

Choosing which monitor records to display