Database Integration Wizard: Step 2
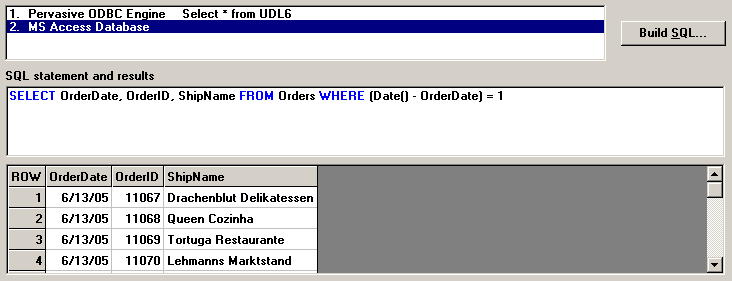
The second step allows you to build and test SQL statements that will return data to be entered in GainSeeker.
You should enter an SQL statement for each connection you defined on Step 1 of the Database Integration Wizard:
-
Click the connection for which to enter an SQL statement.

-
Use one of the following methods to enter the SQL statement for this connection:
|
Data source
|
Query tool
|
|
Microsoft SQL Server database
|
SQL Query Analyzer
|
|
Oracle database
|
SQL*Plus Worksheet
|
|
Pervasive.SQL database
|
SQL Data Manager
|
|
Microsoft Access database
|
SQL view of a query
|
Copy the finished SQL statement from the query tool and paste it into the SQL statement box on Database Integration Wizard step 2.
-
-
Type the SQL statement
Click in the SQL statement box and type the statement or a stored procedure.
For help with SQL commands and reserved words, table names and column names, right-click in the SQL statement box and select an option from the right-click menu. For more information, see Help for typing SQL statements.
-
Use the SQL Statement Design screen
A graphical interface is available to help you build an SQL statement. To use this interface, click Build SQL. For help using the SQL Statement Design screen, see Using the SQL Statement Design utility.
-
To test the SQL statement, click Execute query. The first several records of the query result set are displayed at the bottom of the screen.

|
 Note: Use caution when testing an INSERT, UPDATE, or DELETE query. If the query can be processed without errors, it will modify the contents of the specified table. One good precaution is to back up the table contents just before testing the query. Note: Use caution when testing an INSERT, UPDATE, or DELETE query. If the query can be processed without errors, it will modify the contents of the specified table. One good precaution is to back up the table contents just before testing the query.
|
-
If the query results are not as you expected, repeat the steps above until your SQL statement returns the expected results.
When you modify the SQL statement, the results window is removed from the bottom of the screen and the Execute query button is displayed again.
-
Repeat the steps above to enter SQL statements for the remaining connections.

You can only proceed to Step 3 of the Database Integration Wizard when an SQL statement has been entered for each connection.
-
Click Next to proceed to Step 3 of the Database Integration Wizard.
More:
Help for typing SQL statements
SQL Statement Design
Database Integration Wizard: Step 3


