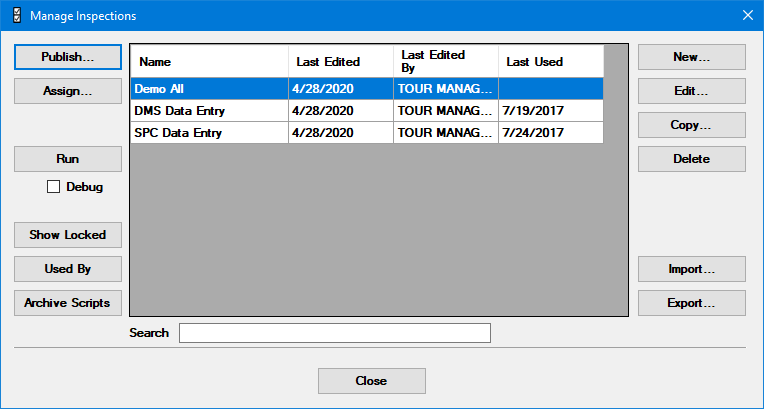
The Manage Inspections window on the GainSeeker Inspections window serves as your springboard for designing a new inspection or performing other actions for existing inspections. You can run these inspections on a:
PC using PC Collect
Mobile device using the GS Collect App
You can also publish an inspection to both device types.

The Manage Inspections window can be accessed from the GainSeeker Inspections module. See Opening the GainSeeker Inspections module
You can use the Publish... button to publish an inspection, verify whether an inspection is published, or to remove it from use. An inspection you create using the Inspection Editor must be "published" (not just saved) before it can be used to run an inspection. Publishing is a quick and simple process.
You can use the Run button on the Manage Inspections window to run an inspection directly from the GainSeeker Inspections module. This can be useful for testing how an inspection that you are designing will perform during the actual inspection process. Optionally - if your inspection includes Python formulas, you can use the Debug check box to run those formulas in the Python Debugger.
To run an inspection from the Mange Inspections window, select that inspection and then click Run. If you have saved changes to that inspection after it was last published, GainSeeker will give you the option to run the earlier published version or to publish your saved changes and run the latest version of the inspection.
![]() Before creating a new inspection there
are a few tasks you must perform. For more information, see Prerequisites to
creating an Inspection
Before creating a new inspection there
are a few tasks you must perform. For more information, see Prerequisites to
creating an Inspection
To create a new inspection, click the New... button on the Manage Inspections window.
Use the Edit... button to open an inspection you want to edit. You can make changes to the inspection using the Inspection Editor and then perform various actions for the inspection using right-click menu such as saving and publishing changes. You can publish it now or later.
To copy a published inspection:
Click the name of the original inspection in the Manage Inspections window list of available inspections. Then, click the Copy... button.
Provide a name for the copy. The name of the copy will display in the list of available inspections.
![]() Copies of published inspections are not
published until you take that action. For more information, see Publishing
your Inspection
Copies of published inspections are not
published until you take that action. For more information, see Publishing
your Inspection
Use the Import... button to import a copy of an inspection to your system from a file you specify. The imported inspection must have been created using the Inspection Editor.
When you import an Inspection that uses Device Profiles or Python Scripts, these items will also be imported. If another Device Profile or Python Design with that name already exists, GainSeeker will back up the original Device Profile or Python Design and import the new one.
Use the Export... button to export a copy of an inspection to a file.
If your inspection uses Device Profiles or Python Scripts, they will also be contained in the export file.
You can archive (back up) the current version of the all of the scripts used by an inspection. (For more information, see Archiving Python Scripts.)
To do so, select the desired inspection and then click the Archive Scripts button.
GainSeeker will prompt you to enter an optional Archive Message, where you can enter a note about this version you are archiving. (You will not be able to change or remove this Archive Message later.)
After clicking Save for the Archive Message, GainSeeker will display a list of the scripts that were archived.
The Show locked... button is used to determine if any inspections are locked to prohibit editing. An informational window will state that:
No locked inspections were found, or
The names of locked inspections.
![]() False,
the default setting of the Locked
property for the inspection allows anyone to edit the inspection in
the Inspection Editor. True locks
the inspection so that only those users whose Roles
are set to edit locked items can edit an inspection.
False,
the default setting of the Locked
property for the inspection allows anyone to edit the inspection in
the Inspection Editor. True locks
the inspection so that only those users whose Roles
are set to edit locked items can edit an inspection.
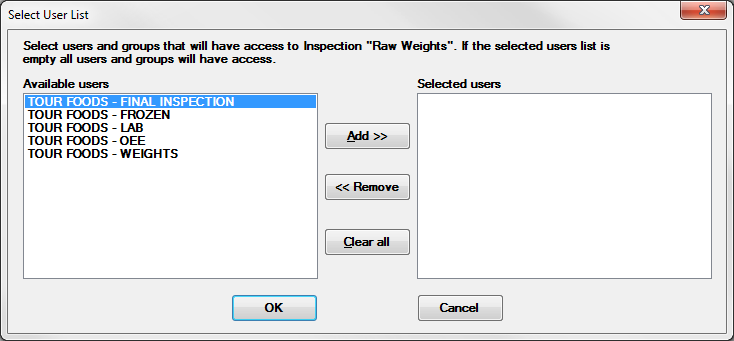
Use the Assign... button to designate which users and groups have access to a particular published inspection.
To allow all Available Users to access this Inspection, do not assign any users. To remove any users that have been assigned, click Clear all.
To allow only specific Users to enter data with this Inspection, Add those users to the list of Assigned Users. This prevents the Available Users from accessing this Inspection.
|

To delete a published inspection from your system: