Adding new items to priority lists
 This topic contains information about the legacy Priority List Editor, which is being phased out from GainSeeker Suite. It is still available for use in the current version of GainSeeker, but is being replaced by the new Priority List Editor function in the GainSeeker Utility module.
Adding items
You can add new standards or desktops to priority lists each time you create a new standard or desktop. (This feature is not available for traceability values.)
Before you set up items to add to a priority list, you should set up the user or group name that will use this list. For more information, see User or Group Names.
To add a new standard or desktop to priority lists, follow the steps below:
-
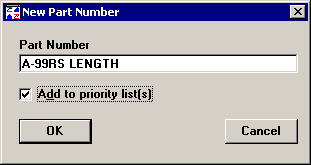
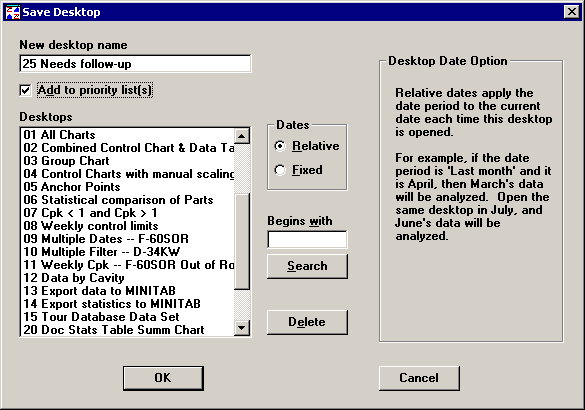
When you create a new standard or a new desktop, select the Add to priority list(s) check box to add it to one or more priority lists after the standard or desktop is saved.


-
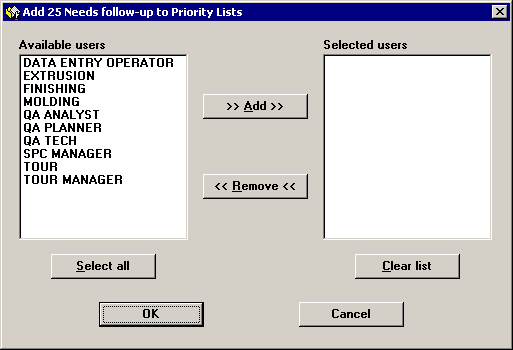
After you have completed the standard or desktop and have clicked OK to save it, you will be prompted to select the user or group names whose priority lists should include this new standard or desktop.

-
Click a user or group name whose priority list should include this new standard or desktop, and then click Add.
To add this new standard or desktop to the priority lists for all user or group names, click Select all, and then click Add.
-
To remove a user or group name from the Selected users list, click the name and then click Remove.
To remove all user or group names from the Selected users list, click Clear list.
-
After you have selected all of the user or group names whose priority lists should include this new standard or desktop, click OK.
More:
Adding existing items to priority lists
Duplicating one priority list to another user or group name
Using priority lists during data entry or analysis
Viewing and printing priority lists
Deleting a priority list
Priority Lists
Setting up items to add to a priority list
 This topic contains information about the legacy Priority List Editor, which is being phased out from GainSeeker Suite. It is still available for use in the current version of GainSeeker, but is being replaced by the new Priority List Editor function in the GainSeeker Utility module.

