|
Contents [Hide] |
There are several ways to view a Dynamic Report as it was designed:
From the main window in Dynamic Reports 2, select a report and then click the View button (or click the File menu and select View).
From the Retrievals for Report window, click Save & View.
From the Design Report window, click the File menu and select Save & View Report.
It is also possible to create a shortcut that will launch the Dynamic Reports module and automatically open the report you specify. For more information, see Setting up shortcuts for automatic functions or the .Launch module.
For many reports, you can apply a different Part Number and/or Process, Date period, and/or Filter before data is retrieved and the report viewer is displayed. The selections you make will temporarily override the SPC retrievals and/or DMS retrievals for the report. (This feature is not available for Scripted retrievals or Advanced retrievals.)
To do so, use the main
window in Dynamic Reports 2 to select a report and then click the
Edit/View button (or click the
File menu and select Edit/View).
(It is also possible to create a shortcut that will launch the Dynamic
Reports module and prompt the user for changes before viewing the report.
For more information, see Setting
up shortcuts for automatic functions or the
.Launch module.)
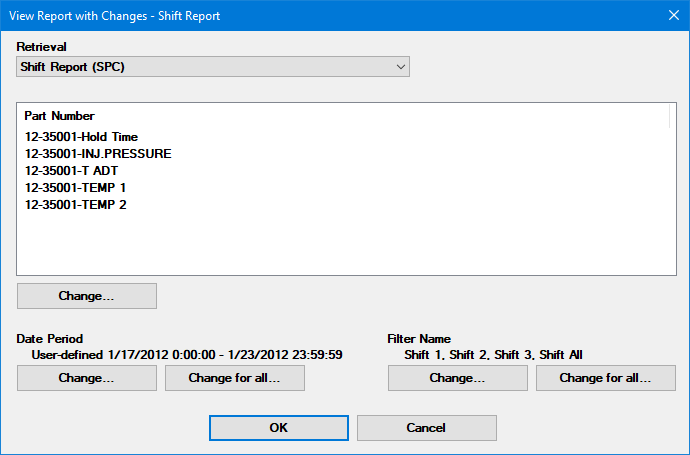
This opens the View Report with Changes window:

First select the Retrieval for which you wish to change the Part Number(s) or Process(es), Date Period, and/or Filter Name, and then click the Change button for the item you wish you change.
For the Filter Name, you also have the option to Change for all which will change the filter for all retrievals of the same type (all SPC retrievals or all DMS retrievals) on the report.
For the Date Period, you also have the option to Change for all which will change the date period for all retrievals on the report.
After you have finished applying temporary changes, click OK to display the Report viewer window.
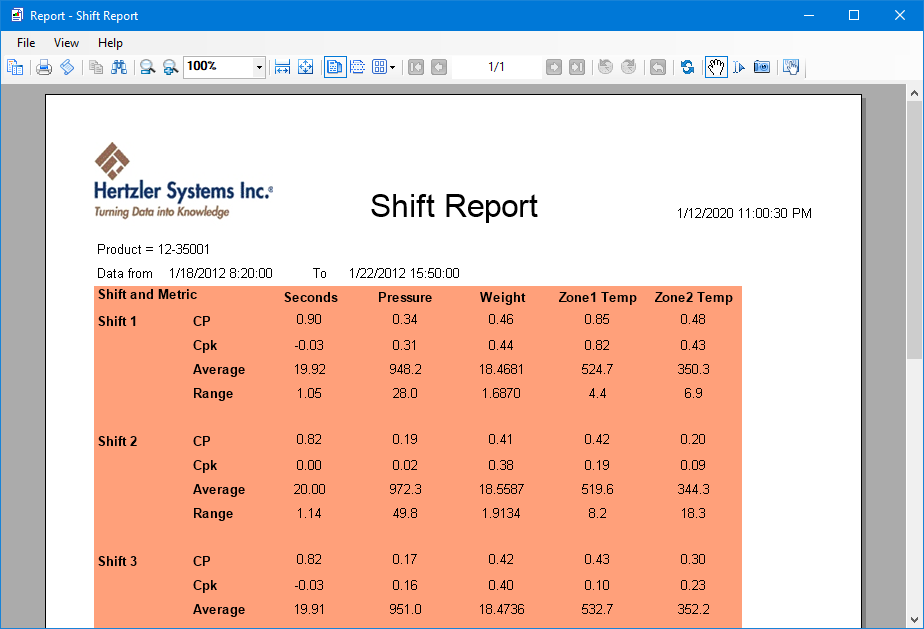
The steps above will display the Report viewer window:

When a report is open in the viewer window, you can browse the report and send it to a file, an application, or the printer. You can also return to the Retrievals or the Design to make changes to the report.
To refresh the data on the report, click the ![]() button. Alternately, you may click the View
menu and then click Refresh.
button. Alternately, you may click the View
menu and then click Refresh.
To print the report, click the ![]() button.
Alternately, you may click the File
menu and then click Print.
button.
Alternately, you may click the File
menu and then click Print.
To send the report to a file:
Click the File menu, point to Send to, and then click Save As File.
On the Save As
screen, choose the location, file name and file type for the
new file you want to create. Then click Save.
Please note that image file types will append numbers such
as 001, 002, etc. to the file names, and will display one
report page per image file.
To send the report to email, click the File menu, point to Send to, and then click Email. This will open a new email and attach a .pdf copy of the report.
If you click the File menu, point to Send to, and then click any other option (e.g., Image, HTML, etc.), the program will use a default file name to create the file in your Windows TEMP folder and then open this new file using the Windows default program for this type of file.
For more details about using the Report viewer window, see https://www.hertzler.com/activereports13help/viewer.