You may want to invest time early in the GainSeeker setup process to think strategically about your defect management goals and the key processes you need to track.
You might also consider implementing cost-tracking capability. This powerful feature can help you discover which defects are costing your organization the most. Then, you can focus corrective actions on the issues that yield the biggest improvement in reducing the high costs of poor quality.
Note: Some actions detailed in this topic may require specific rights.

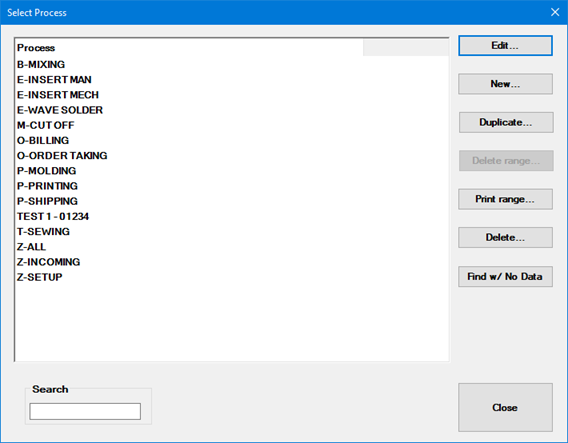
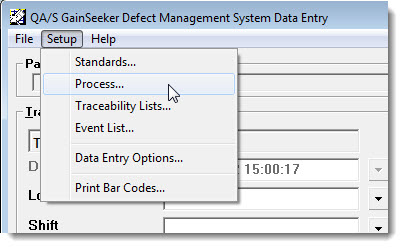
You can change or add to the list of DMS processes using the Select Process dialog that is accessible from either the:
GainSeeker Charts module
DMS Data Entry module
The dialog can also be accessed from the Inspection Editor, PC Collect, and GainSeeker Utility.
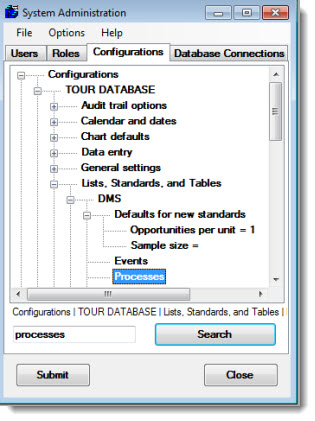
Navigate to the Processes setting on the Configurations tab following this path:
Configurations | (configuration name) | Lists, Standards, and Tables | DMS | Processes
Right-click the Processes setting to open the Select process dialog. See Performing action for processes and defects below.
The Select Process dialog opens. See Performing action for processes and defects below.

The Select Process dialog opens. See Performing action for processes and defects below.
Click New on the Select Process dialog.
The New Process dialog opens:
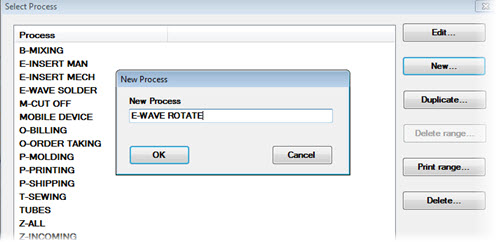
Enter a name for a process in the New Process text field, and then click OK.
The Process Information dialog displays. You can enter process information or click OK to accept default values for the process.
Repeat this sequence for each process you want to add.
 If
you are creating processes with similar settings, you may want to use
the Duplicate... button.
Highlight a process in the list that is similar to the new one you want to add, and then click the Duplicate... button. Change the name that displays in the Process text field of the New Process dialog to a unique name for the process.
After creating the list of processes, you will need to provide some information for each process you added.
Highlight a process in the Select Process dialog list, and then click Edit to display the Process information dialog.
The first two items—Improvement curve start date and Improvement curve start value (DPM)—establish the starting date and DPM (defects per million) value for displaying the 10x improvement curve on DPU charts. You can leave these fields blank, but you cannot draw an improvement curve on your DPU charts if these fields do not contain values. The optional Memo field is useful for recording a short note about the process.
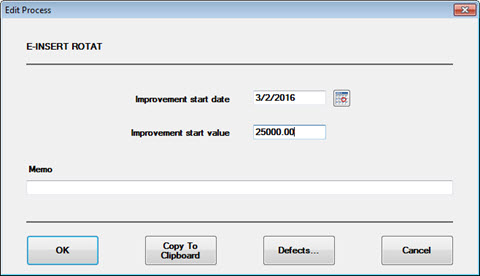
When you are finished, Click Defects... to open the Defects for ["process"] dialog. See Building a defect list below.
Now, you can begin to build a list of available defects for all your processes. These are defects that are likely to be present in your processes at one time or another. Identifying specific defects is critical to the success of your DMS efforts. The master defect list is an inventory of all defects that may occur in one or more of the processes. The master defect list (labeled Available Defects) is located on the left side of the Defects for ["process"] dialog.
(In a later step, you can assign one or more of these defects to specific processes)
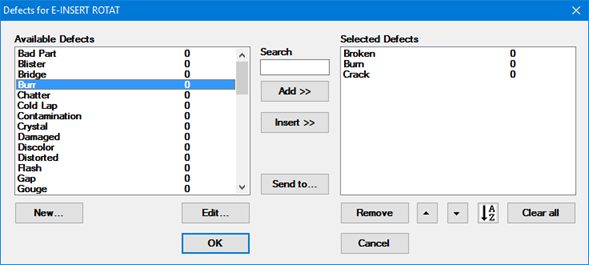
To add a new defect to the Available Defects list:
Click New on the Defects for ["process"] dialog to display the New Defects dialog.
Enter a name for the defect in the Defect text field. You can also define a cost for that defect. See Implementing cost-tracking capability below.
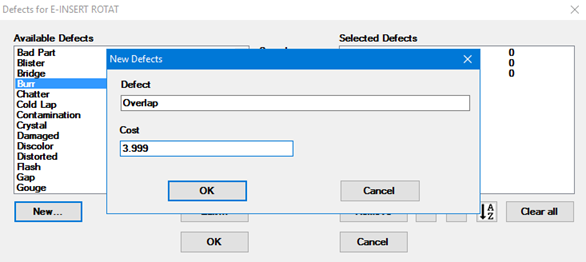
Repeat these steps to add additional defects to the master list.
You can optionally assign a cost to a defect (the "cost per defect"*) in the Cost text field on the New Defects dialog.
 *The
cost per defect is the cost of
a defect (a defective thread on a bolt, for example). Another option is
to assign a cost per unit (the
cost of the whole bolt, for example) using the Standard
Information dialog. The cost per
unit is the cost for the whole part (not the cost for individual
defects it may have). A third option for cost tracking is to store actual
costs in the data record as a traceability value. For more information,
see Using
the Traceability column for cost information.
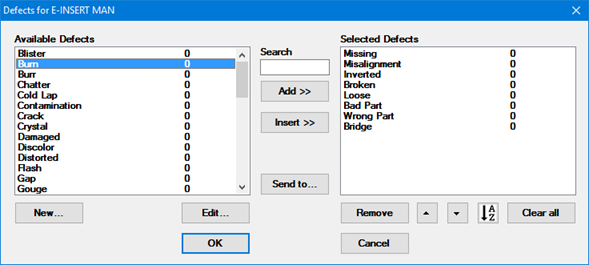
You can now assign one or more defects from the Available Defects list you created to the processes in which they might occur. In the following example, the defect Bridge is added to the list of possible defects for the process E-INSERT MAN.
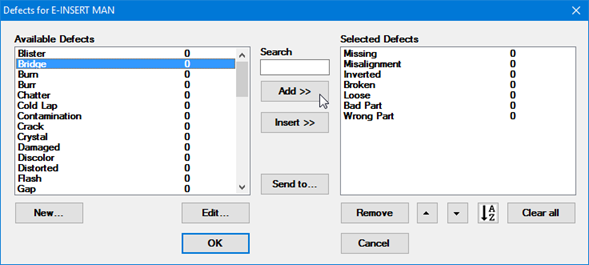
The defect Bridge now displays in the Defects for E-INSERT MAN as a defect for that process.
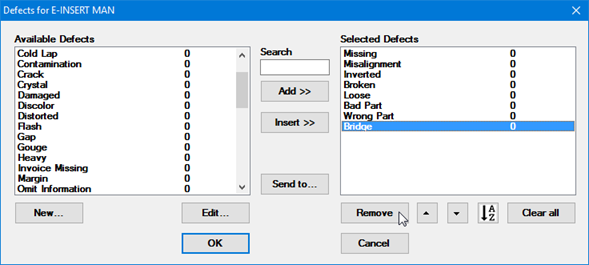
![]() Deleting a defect from the Available
Defects list is not allowed. Instead, you can disassociate that
defect from a process by removing it from the list on the right. Because
of this, the defect remains in the Available
Defects list so it can be used for analyzing historical data.
Deleting a defect from the Available
Defects list is not allowed. Instead, you can disassociate that
defect from a process by removing it from the list on the right. Because
of this, the defect remains in the Available
Defects list so it can be used for analyzing historical data.
To remove a defect for a process:
To edit a defect name and/or cost:
The Edit Defects dialog displays.
If you change a defect name, GainSeeker will generate a list of the inspections and Python scripts that you may need to manually update to use the new name. If the old name contained one of six special characters (< > & \ " or '), some of the inspections and scripts displayed may not actually require updating.
If you change a defect name, all historical data stored for the previous name will be associated with the new name.
The up and down arrows let you control the order that the items appear on the defect list, here and in the Data Entry and GainSeeker Charts modules. You may want to reposition the most frequently occurring defects so they display at the top of the list and keep the remaining defects listed in alphabetical order. To reposition a defect in the list, highlight it then click the up or down arrow until the defect is where you want it:

Another option is to use the  button to sort the defects in alphabetical order (ascending).
The Clear all button clears the list of defects for the selected process.
You can use the Send to... button on the Defects for ["process"] dialog to send a list of defects for a process or a list of all defects to a text editor for viewing and printing.
The Print range button on the Select Process dialog lets you print a report on the processes you have set up. You can select which processes and process information items to include in the report. This report is printed to your editor
The Print bar codes button located on the Select Process dialog (that opens from the DMS Data Entry module) lets you print bar code sheets for use with the bar code data entry method for one process at a time.
The Delete button on the Select Process dialog allows you to delete one or more processes you select. GainSeeker will only delete Processes for which there are no DMS standards.
If you stop collecting data for some processes, and if you routinely archive and delete old data from your database, you may eventually have processes for which there is no data. You can remove these unnecessary processes from GainSeeker.
On the Select Process window, click Find w/ No Data.

This displays a list of DMS processes for which there are no data records.

To copy this list of processes to clipboard, click Send to Clipboard.
Select the individual processes you want to delete, or click Select All to select them all.
To delete the selected processes, click Delete. GainSeeker will only delete Processes for which there are no DMS standards.