 To open and run an inspection on a PC, you must have already published at least one inspection for use on a PC. See Publishing your inspection for more information.
To open and run an inspection on a PC, you must have already published at least one inspection for use on a PC. See Publishing your inspection for more information.
If you are running in Windows Tablet mode, see Using the touch keyboard for data entry.
You can open the PC Collect module from the:
LaunchPad module
.Launch module
Power Tools menu in the SPC Data Entry, SPC Planner, and SPC Designer modules
You can also create a shortcut to launch any GainSeeker module from your desktop or Start menu.
These options will only be available if you log in as a User whose Role has Module Access rights to the PC Collect module.
The PC Collect module main window is where running an inspection begins.
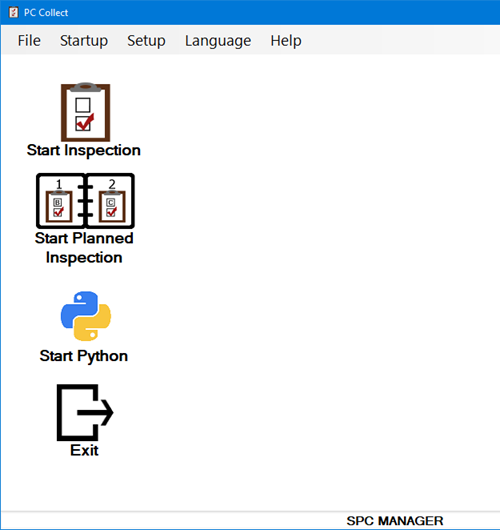
When you launch the PC Collect module, the Inspection Viewer window or the Script Selector window may be automatically displayed. You can change this default behavior by closing the displayed window and then choosing an option from the Startup menu.
When all windows have been closed, you can work with buttons and menu options on the PC Collect module main window.
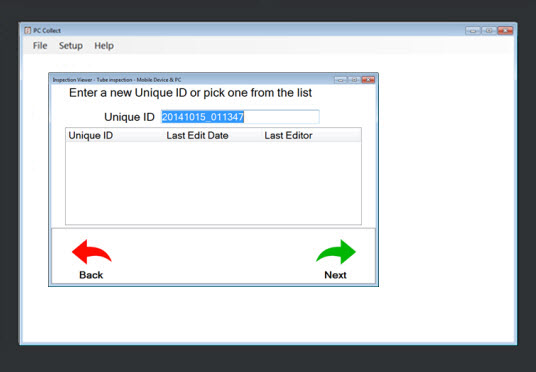
Click the Start Inspection button on the PC Collect module window to open the Inspection Viewer.
Inspections you can run display on the Pick an Inspection page in the Inspection Viewer.

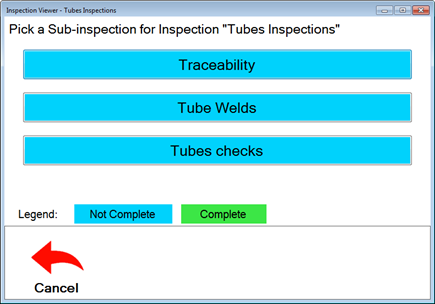
A sub-inspection is a page that contains tests to be performed for a specific segment of the inspection. Every inspection contains at least one sub-inspection.
Depending on how the auto AutoAdvance property is set for the inspection you are running, you should:
Or, the sub-inspection to perform next will be highlighted in the list of available sub-inspections
Or, you will be automatically advanced through the sub-inspections in the order intended by the person who designed the inspection.
Every sub-inspection will have at least one task to perform. This might include selecting a checkbox to confirm you have completed a task, for example, or clicking a Pass or Fail button when the inspected item passes or fails the criteria set for the test.
After you have completed all the tests on a sub-inspection page (not all of the tests may require completion), you need to submit the information to the database where it will be stored.
To submit all the data and information for that sub-inspection:
Note: Your inspection may also include a Cancel button, depending on how the inspection has been designed. When you click the Cancel button, data and information for that sub-inspection is not saved to the database. When you click the Cancel button, in most cases, you will automatically be returned to the page where you can select a sub-inspection to run.
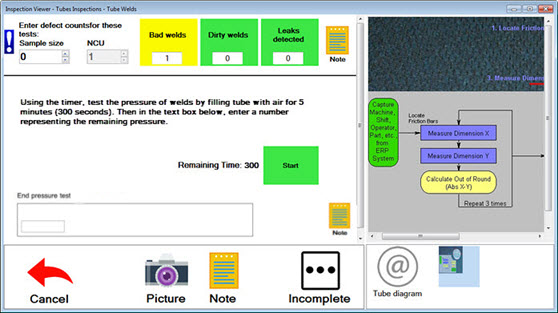
Each sub-inspection page may display buttons for additional features that you can use. Whether these buttons display depends on how the inspection has been set up by the inspection designer. For example, your sub-inspections may feature one or more Notes buttons that allow (or in some cases, require) you to include a note when a test for that sub-inspection fails.
For information about all the features buttons, see the topic Using sub-inspection features
This is an example of some of the features buttons that may be included on a sub-inspection page, depending on how your inspection has been designed:
