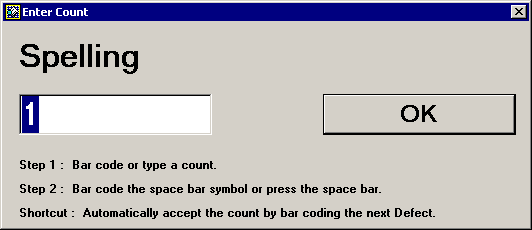
With the Defect list highlighted, scan the bar code for the first defect found. This displays the Enter Count screen for that defect, with the number of defects found set to 1.

Continue to scan the bar code each defect as it is found.
The Enter Count screen will be updated each time a new type of defect is entered, and the defect count on this screen will be set to 1 each time another defect bar code is scanned.
Each time you scan the bar code for the next defect or for the OK button, the defect Total on the main DMS Data Entry screen will be incremented.
After scanning the bar code for the last defect found in the sample, scan the bar code for Space (OK). This closes the Enter Count screen and returns you to the main DMS Data Entry screen. It also adds the last defect found to the defect Total on the main DMS Data Entry screen.
After entering all the defects in your sample, see the instructions in Performing other functions with a bar code reader for setting the Sample size and other settings and for saving the data.