You can use a Filter to retrieve standards or analyze data only for data points that meet the criteria you set for a traceability field, corrective action, bypass, date/time, or part number. You can also use a Filter to sort data in order by a value other than the date/time stamp.
Filters are stored in the program and can be used again to analyze data without having to create a new filter each time. They can also be edited and deleted.
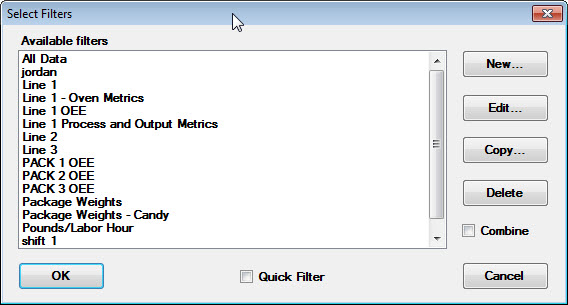
To work with filters, the Quick filter check box must be cleared.
|
To |
Do this |
|
Turn on a filter |
Select the filter name in the Available filters list, and then click OK. |
|
Turn off a filter |
Select the filter named All Data in the Available filters list, and then click OK. |
|
Create a new filter |
|
|
Create a new filter |
|
|
View or change the |
|
|
Delete a filter |
|
|
|
If you selected Analysis Mode 2 on Quick Chart Step 1, one more option is available:
To apply the selected filter to all part numbers or Short Run process specifications that you selected on Quick Chart Step 1, select the Apply filter to all items in selected values list check box.
To apply the selected filter only to the values you selected on Quick Chart Step 2 for retrieval and statistical options, clear the Apply filter to all items in selected values list check box.
After making your selections, click OK to keep your changes or Cancel to undo your changes. You will then be returned to the Retrieval Options screen.
More: