Setting the timer for a dashboard
You can configure the dashboard to automatically update itself with the latest data on a regular basis:
-
Right-click on the dashboard and choose Timer from the right-click menu. Alternately, you may click the Options menu and then click Timer.

-
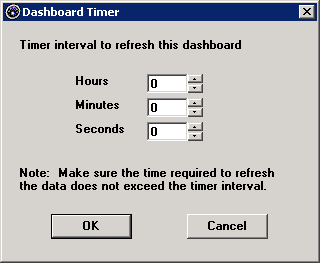
On the Dashboard Timer screen, set the number of Hours, Minutes and Seconds to wait between automatic refreshes and then click OK.
To turn off the timer, set the number of Hours, Minutes and Seconds to 0.
If you have purchased the Server Edition of GainSeeker, additional options are available on this screen.
The specified time interval will begin when you click OK on the Dashboard Timer screen. After you have saved this change to the dashboard and closed the dashboard window, the time interval will begin when this dashboard is opened.
On some versions of Windows, when the Enterprise Dashboard module displays or refreshes a dashboard, it will become the active program in Windows – even if you were currently working in a different program. To prevent the Enterprise Dashboard module from becoming the active program each time a dashboard is displayed or refreshed, add nofocus=1 to the Convert.db file. This setting will also be applied to the SPC Charts and Reports module and the DMS Charts and Reports module.
Note: When Convert.db contains nofocus=1, the SPC Charts and Reports module and the Enterprise Dashboard module will display the Stop panel on the status bar instead of the Retrieving Data screen – regardless of the stop_form= setting.
