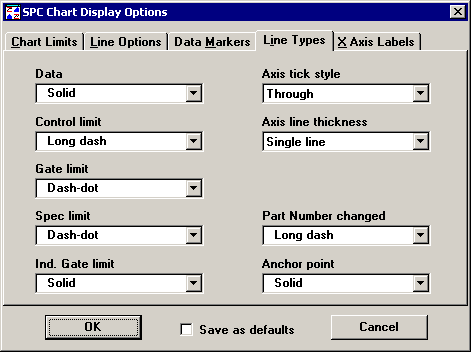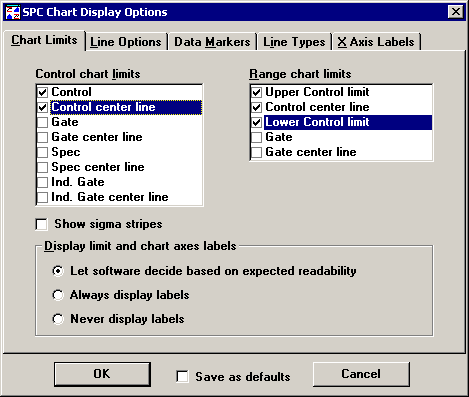
The normal SPC Chart Display Options screen.
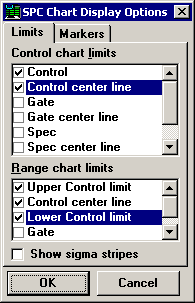
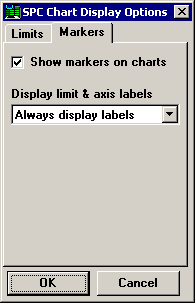
The SPC Chart Display Options screen in PDA mode at 240 by 320 pixels.
When a control chart is displayed on your screen, you can set options such as which limits are displayed, how the x-axis is labeled, and how lines are drawn.
To set these limits and more, right-click on the control chart and then click Display Options. Alternately, choose Display Options from the Options menu (in the SPC Charts and Reports module) or from the Chart Options menu (in the SPC Data Entry module) .
|
|
|
|
The normal SPC Chart Display Options screen. |
|
|
|
|
|
The SPC Chart Display Options screen in PDA mode at 240 by 320 pixels. |
|
On the Chart Limits tab, you can select the control, gate, spec, or individual limits to display on the chart. For an X-Bar/Moving range/Range chart, the Range chart limits for Gate and Gate center line will only apply to the chart type selected in the standard.
For the Chart Limits you select, GainSeeker will determine the best fit for displaying the labels and values for these limits on the right-hand side of the chart. If you prefer to use a larger percentage of the chart window to display each of the selected limits (and its associated center line), add old_spacing=1 to the Convert.db file.
On this tab, you may choose to display green, yellow and red sigma stripes on the chart. In PDA mode, these options are available from the Limits tab.
You may also choose when to display or suppress the labels for the chart limits you selected ( UCL, LCL, etc.) and for the x-axis and y-axis, based on the size of the chart. In PDA mode, this option is available from the Markers tab.
|
|
For more options, click the Line Options tab. (In PDA mode, these options are not available.)
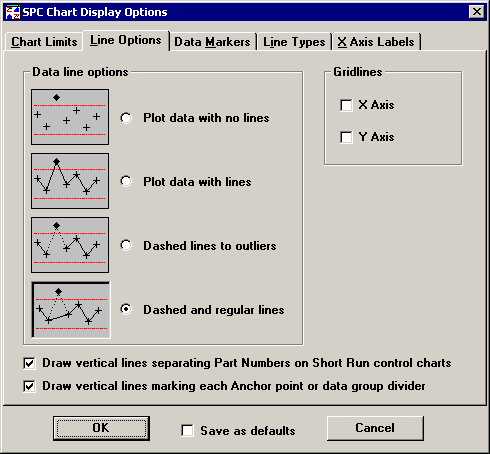
On this tab, you can choose how the lines are connected. You can also draw horizontal (X-axis) or vertical ( Y-axis) lines on the chart.
In addition, you may choose whether to display vertical lines for Short Run or anchor points. For more information, see Chart defaults.
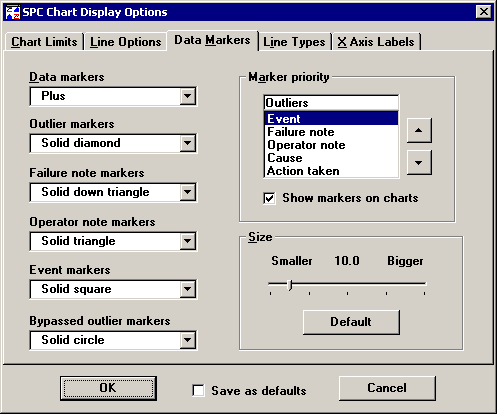
On the Data Markers tab, you can select the symbols for the data displayed on the chart. In addition, you may set the marker priority and marker size. (In PDA mode, these options are not available.)
The Show markers on charts check box allows you to display failure notes, operator notes, outlier, corrective action, event, cause and action. When unchecked, the charts are drawn without markers. In PDA mode, this option is available from the Markers tab.
On the Line Types tab, you can select the line type for the data, limits, axis, and vertical lines displayed on the chart. (In PDA mode, these options are not available.)
|
|
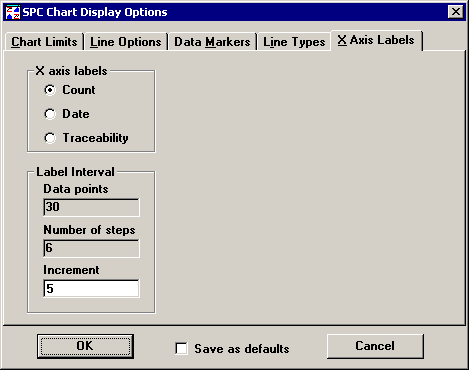
On the X Axis Labels tab, you can select what values are displayed on the X Axis. You can choose from Count, Dates, or Traceability labels. (In PDA mode, these options are not available.)
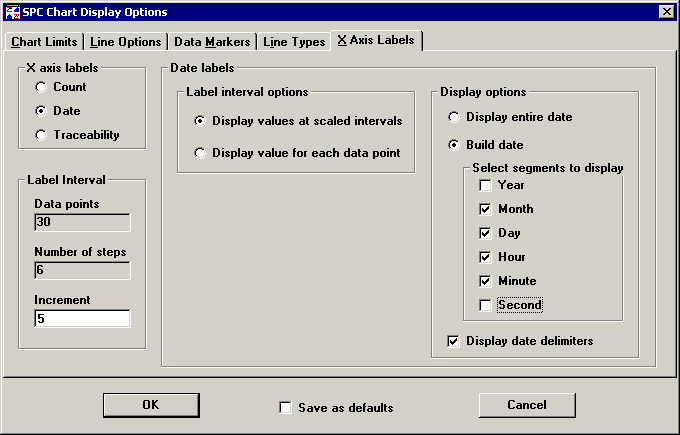
When displaying date labels, you can select the label interval, and whether to display the entire date or customize the segments to display.
|
If you have more than 12 data points displayed on your chart, the program shifts the labels from a horizontal to a vertical position in order to allow enough space for them on the chart. |
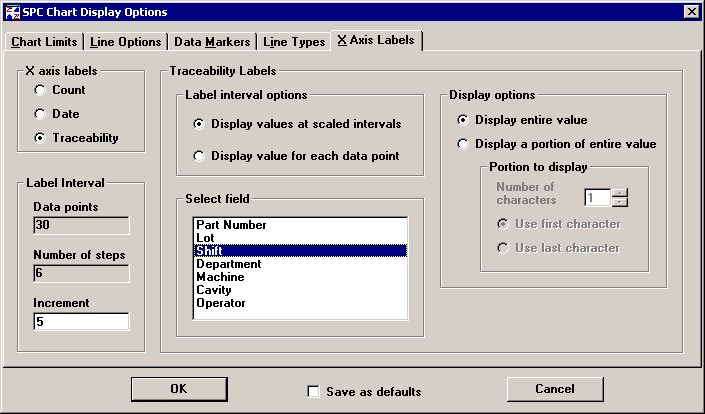
When choosing to display traceability labels, you can set the label interval, which field to display, and whether to display the entire value or just a portion of it.
Since a field may have up to 30 characters, you may want to shorten the value label in order to make the chart easier to read. (If the label is short, click on Display entire value.)
To shorten the value label:
If the label is long, click on Display a portion of entire value.
Select the number of characters from the label you want to display by clicking on the up or down arrow buttons.
Then select if you want to display the first or last characters of the value.
For example, if you decide to display eight characters, you can then choose whether you want the first eight or the last eight characters from the value displayed.
To save your options as the new default settings for this workstation, select the Save as defaults check box and then click OK.
|
|