You can change the settings and change the name for any user-defined role, but not the names or settings for the pre-defined roles
|
Contents [Hide] |
To change the settings for a role:
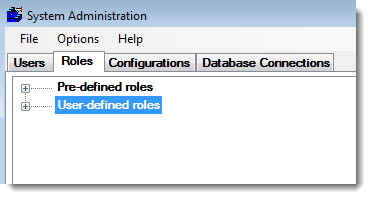
Navigate to the Roles tab in the System Administration module.
Then, expand the User-defined roles tree. For the role you want to change, expand the tree.
|
Symbol |
Access level |
Description |
|
|
|
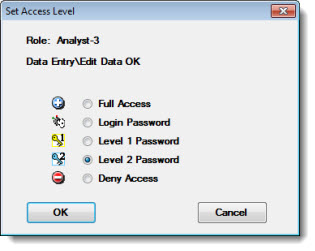
Full Access |
This feature is available to the user, and the user is not prompted to enter a password when they access this feature. |
|
|
|
Login Password |
If a login password has been set for the user, the user must enter this password before they can use this feature (except in WebViz see notes below). This is useful in the case where GainSeeker may run unattended at some workstations. You can set this access level for features that should be available to GainSeeker users but not to others who share the GainSeeker workstation. |
|
|
|
Level 1 Password |
If a Level 1 password has been set for the configuration, the user must enter the requested password before they can use this feature (except in WebViz - see notes below).
This is useful for features that should be unavailable to most GainSeeker users but easily accessible to power users who know the Level 1 password. |
|
|
|
Level 2 Password |
If a Level 2 password has been set for the configuration, the user must enter the requested password before they can use this feature (except in WebViz - see notes below).
This is useful for features that should be unavailable to most GainSeeker users but easily accessible to power users who know the Level 2 password. |
|
|
|
Deny Access |
The user cannot use this feature. |
If you have installed GainSeeker WebViz:
Any GainSeeker user can use a web browser to log in to WebViz by typing their GainSeeker login name and password.
After the user has logged in to WebViz, items for which the user's role has been assigned to Login Password, Level 1 Password or Level 2 Password will function the same way as items for which the role has been assigned to Full Access. That is, WebViz will not stop to ask for a Level 1 password, a Level 2 password, or the login password (except when initially logging in to WebViz).
For each group of settings that displays the ![]() or
or ![]() symbol, you can set the Access Level for the group to Full Access and Deny Access:
symbol, you can set the Access Level for the group to Full Access and Deny Access:
If a group is set to ![]() Deny Access, then the user will be denied access to all of the individual settings in that group – regardless of the Access Level assigned to each setting.
Deny Access, then the user will be denied access to all of the individual settings in that group – regardless of the Access Level assigned to each setting.
If you expand a group that is set to Deny Access, all of the individual settings in that group have symbols that are shaded red, as shown in the example below. This represents that the user will be denied access to the settings in this group.
If a group is set to ![]() Full Access, then the Access Levels for the individual settings in the group will be applied to these program functions.
Full Access, then the Access Levels for the individual settings in the group will be applied to these program functions.
Right-click that setting or group. The Set Access Level dialog box opens. Click the access level you want to apply to this setting for this role, and then click OK.
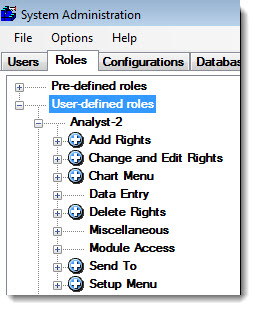
The settings for a role can be found in these groups:
Add Rights
This group includes permissions for entering new items in GainSeeker.
Change and Edit Rights
This group includes permissions for changing items that are already stored in GainSeeker.
Chart Menu
This group includes permissions to use functions that may be available when the user right-clicks on a chart.
Data Entry
This group includes permissions to use menus and other functions that may be available in the SPC Data Entry and/or DMS Data Entry modules.
Delete Rights
This group includes permissions for deleting items that are already stored in GainSeeker.
|
|
Miscellaneous
This group includes other permissions, such as the ability to change a user's password or to save changes as the new default.
Module Access
This group includes permissions for logging in to different GainSeeker modules.
Send To
This group includes permissions for sending charts and other items to destinations such as clipboard, e-mail, file or printer.
Setup Menu
This group includes permissions to access various commands on the Setup menu in some GainSeeker modules.
Navigate to the Roles tab in the Administration module.
Expand the User-defined roles tree (if needed).
Right-click on the role you want to rename, and then click Rename.
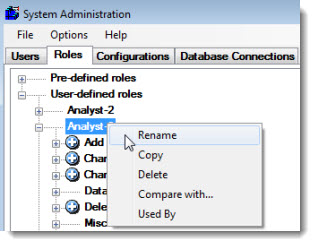
The New Role dialog box opens.
Enter the new role name, and then click OK.
Click the Submit button![]() on the System Administration dialog box Roles tab to add the new user name.
on the System Administration dialog box Roles tab to add the new user name.