In most cases, it is not necessary to enter the date/time stamp during data entry, because the program will automatically apply the computer clock date and time to the data record.
However, if you need to enter data that was measured before today, you may want to manually set the date/time stamps of the data subgroups to reflect the date and time when they were actually measured.
In a Quick Start data entry session
In a Quick Start data entry session, you can change the date/time stamp from the Traceability tab. For more information, see Entering Traceability information from Quick Start .
In a template, planned session or stored session
If your template , planned session or stored session is set up to accept date and time input, it will display a prompt similar to the following:

Notice that the prompt heading displays the date/time stamp format you should use. The details of format used by the date/time stamp are set in the Administration module.
To enter the current date and time, press ENTER.
To change the date and time, use one of the following methods:
Type a new date and time using the displayed format, and then press ENTER.
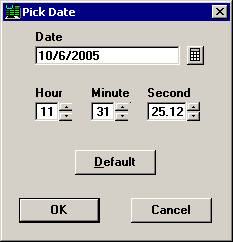
Click the calendar button ![]() to select a date/time stamp from the following screen:
to select a date/time stamp from the following screen:

You can click the ![]() button to click the desired date from the calendar.
button to click the desired date from the calendar.
After you have selected the new date/time stamp, click OK.