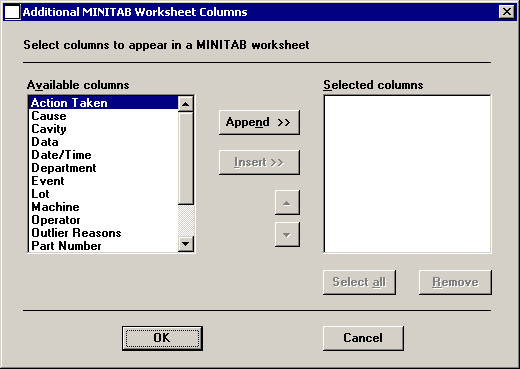
If MINITAB will be visible after drawing the chart, and if you want to send values to the MINITAB worksheet in addition to Column 1 and Column 2, click Send additional columns. This button is unavailable if the MINITAB is visible after drawing the chart check box has been cleared.

To add a value to the end of the list of Selected columns to be sent to MINITAB, double-click the value in the Available columns list.
Alternately, click the value in the Available columns list, and then click Append.
To insert a value above the selected item in the Selected columns list, click the value in the Available columns list, and then click Insert.
To remove an item from the Selected columns list, click the item and then click Remove.
The values in the Selected columns list will be added to the MINITAB worksheet as %C3, %C4, etc., in the order listed here . (If Column 2 is defined as <none>, then these columns will be %C2, %C3, etc.)
To change the order in which columns will be sent to MINITAB, select an item in the Selected columns list. Then click the ![]() and
and ![]() buttons to move the selected item up or down the list.
buttons to move the selected item up or down the list.
When you have finished selecting columns to send to MINITAB, click OK.