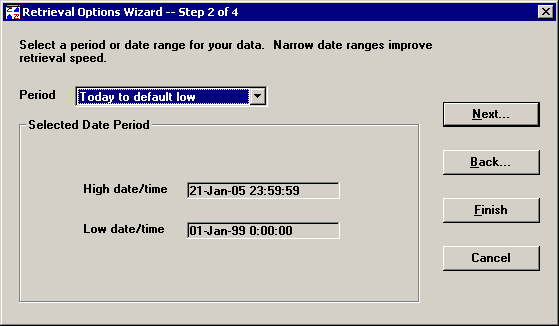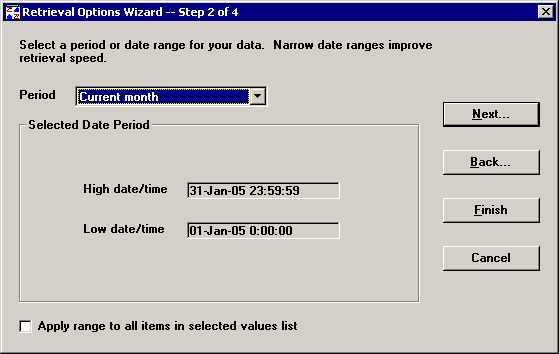
Step 2 of the Retrieval Options Wizard allows you to set the range of dates to analyze for each part number or Short Run process specification you selected on Chart Wizard Step 1.

To choose a range of dates to analyze, select an option from the Period list. After you choose a period, the Selected Date Period shows the exact High date/time and Low date/time for analyzing data.
To easily select a quarter, month, week or day for any year, select  Custom by period:
To specify any High date/time and Low date/time you want, select  Custom by date:
The period Today to default low sets the High date/time to today's date and the Low date/time to the value that was configured by your GainSeeker Administrator. For more information on setting the default low date, see Setting Date and Calendar Preferences.
|
|
If you selected Analysis Mode 2 on Chart Wizard Step 1, one more option is available:

To apply the selected date range to all part numbers or Short Run process specifications that you selected on Chart Wizard Step 1, select the Apply range to all items in selected values list check box.
To apply the selected date range only to the values you selected on Chart Wizard Step 3 for retrieval and statistical options, clear the Apply range to all items in selected values list check box.
After setting the options on this step, you have several options:
To keep your changes and return to Retrieval Options Wizard Step 1, click Back.
To undo your changes and return to Chart Wizard Step 3, click Cancel.
To select a filter, measurement conversion, or advanced retrieval options, click Next to move to Retrieval Options Wizard Step 3.
To keep your changes and return to Chart Wizard Step 3, click Finish.