option
explanation
setting
description
0
Reset all DMS_OPT options to their default settings.
0
1
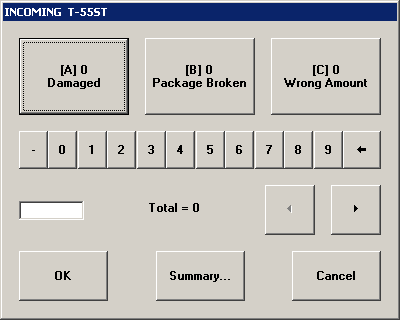
Show or hide hot key letters on defect buttons. (example)
In button mode, the letters [A] to [Z] are automatically assigned to the first 26 defects. When a defect button is highlighted or the cursor is blinking in the number field, pressing the hot key is the same as clicking the associated defect button – even when the hot key letters are hidden. Hot keys are not active in list mode.
1
Show the hot key letters on defect buttons.
0
Hide the hot key letters on defect buttons.
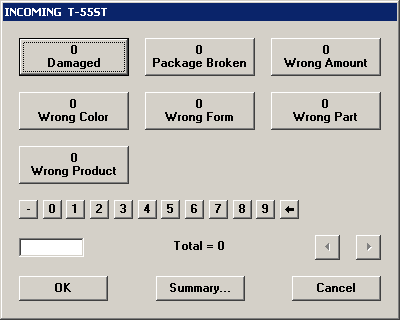
Set the width of the defect entry screen.
number
Number of pixels for the width of the defect entry screen.
The minimum width is 200 pixels.
If you specify a number lower than 200, the default width of 640 pixels will be used.
Use the full width of the user's display.
Set the height of the defect entry screen.
number
Number of pixels for the height of the defect entry screen.
The minimum height is 200 pixels.
If you specify a number lower than 200, the default height of 480 pixels will be used.
Use the full height of the user's display.
4
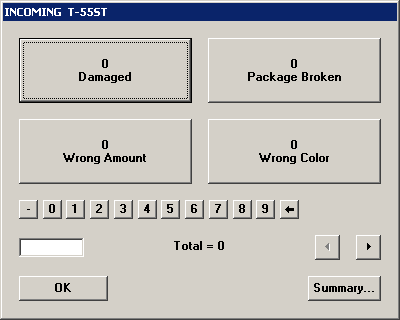
Set the maximum number of defect buttons to display at one time on the defect entry screen. If this maximum is lower than the number of defects configured for the process, the user can click the ![]() and
and ![]() buttons to access the remaining defects. (example)
buttons to access the remaining defects. (example)
This can be useful if many defects are available for a process, but the majority of inspections find only a few of these defect reasons.
The actual number of defects displayed at one time is also affected by the longest button label and by the size of the defect entry screen.
number
Maximum number of buttons.
If the number is
This setting is not active in list mode.
0
Display as many buttons as possible (the default setting).
5
Show or hide the Cancel button on the defect entry screen.
Hide the Cancel button.
0
Show the Cancel button (the default setting).
6
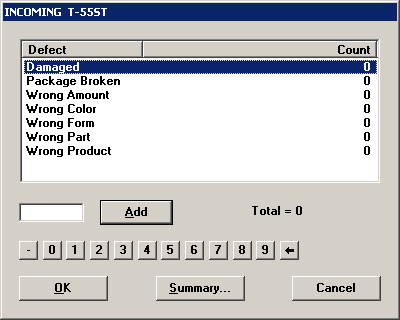
Show defect reasons as a list (example) or as buttons.
In list mode, to change the count for a defect, you can click the defect and then click Add, or you can double-click the defect.
1
List mode.
0
Button mode (the default setting).
7
Change the size of the number buttons, the arrow buttons, OK, Summary, and Cancel.
Note: Defect buttons are not affected by this setting. The size of your defect buttons is determined by the combination of:
• The longest defect reason being displayed
• The height and width of the defect entry screen
• The maximum number of defect buttons
1
Large buttons.
0
Normal buttons (the default setting).
8
This setting overrides the Set nonconforming units = defects configuration setting.
It determines whether or not the number of nonconforming units will be automatically calculated and set by
1
Automatically calculate and set the number of nonconforming units.
0
Do not automatically calculate or set the number of nonconforming units.
To set the number of nonconforming units, use the formula
9
Display or hide the Note button.
If displayed, the user can click Note to choose an Event and/or add a note.
1
Display the Note button.
0
Hide the Note button (the default setting).
10
Enable or disable one-click mode for the defect entry screen.
When one-click mode is enabled, the defect entry screen will automatically close after the user:
• clicks a defect button (in button mode)
• double-clicks a list item, clicks the Add button or presses the ENTER key (in list mode)
1
2
Enable one-click mode and hide the OK button.
If the Cancel button is also hidden, the user cannot proceed until they select a defect.
any other number
Disable one-click mode (the default setting).
11
Enable or disable "add-next" mode for the defect entry screen in list mode.
This is how the program works when add-next mode is enabled:
• When the defect entry screen is displayed, the cursor is automatically placed in the box next to the Add button and the first defect is highlighted.
• The user types the count for the highlighted defect (or leaves it blank if there were no defects of this type) and then presses the ENTER key to highlight the next defect in the list.
This setting does not affect the data entry screen in button mode.
1
Enable add-next mode.
any other number
Disable add-next mode (the default setting).
12
Enable or disable "replace" mode for the defect entry screen in list mode.
• When replace mode is enabled, the label on the Add button is changed to Set. In this mode, typing a number and clicking the Set button (or pressing the ENTER key) replaces the previous count for the highlighted defect with the number you have typed.
• When replace mode is disabled, typing a number and clicking the Add button (or pressing the ENTER key) increments the previous count for the highlighted defect by the number you have typed. This is the default setting.
This setting does not affect the data entry screen in button mode.
1
Enable replace mode.
any other number
Disable replace mode (the default setting).
13
Change the default focus on the DMS_COUNTS window from the OK button to a defect button.
1
Places the focus on first defect count button.
If in "add-next" mode (see DMS_OPT 11,1), this setting is ignored.
0
Places the focus on the OK button (default)


