
There are three possible ways to enter corrective action information for a data subgroup:
From a prompt in the data entry session
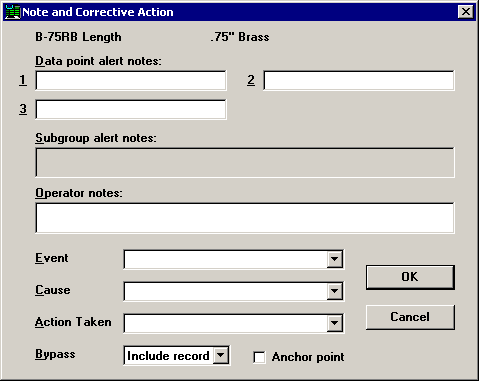
The data entry session may prompt you to enter an Event, Cause or Action Taken by displaying a message similar to the following example:
To add or change the Event, Cause or Action Taken, click the ![]() button and select the appropriate value from the pre-defined list. Or, if the list is automatically displayed, simply select an item from the list.
button and select the appropriate value from the pre-defined list. Or, if the list is automatically displayed, simply select an item from the list.
When a real-time failure occurs
You can also enter an Event, Cause or Action Taken for a subgroup if a real-time failure occurs. For more information, see Responding to real-time failures for the subgroup.
At the initiative of the data entry operator
If your data entry session does not prompt you to do so, you can still add an Event, Cause or Action Taken before saving the subgroup by following the steps below:
If you are entering data for multiple standards, make sure you are in an input cell for the standard for which you will attach corrective action information to the data.
By default, the data entry screen will display the name of the current standard above and below the input cell.
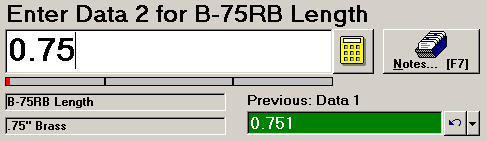
In this example, you can add corrective action information to a data subgroup for the standard B-75RB LENGTH.
Click the Notes button or press F7 to display the Note and Corrective Action screen.
In PDA mode , click the CA tab.
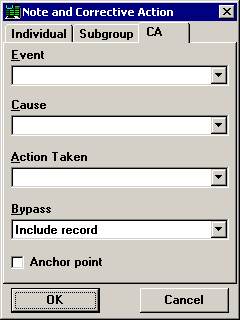
To enter an Event, Cause or Action Taken, click the desired list and then select the item that best describes your situation.
After entering your Event, Cause or Action Taken, you may also add an operator note, bypass, or anchor point information to this data subgroup.
To close the Note and Corrective Action screen, click OK or press Enter.