Filtering the records displayed in the monitor
|
 Note: This topic contains information about the legacy SPC Database Monitor module, which is being phased out from GainSeeker Suite. It is still available for use, but is being replaced by the Monitor Table chart window in the newer GainSeeker Charts module. Note: This topic contains information about the legacy SPC Database Monitor module, which is being phased out from GainSeeker Suite. It is still available for use, but is being replaced by the Monitor Table chart window in the newer GainSeeker Charts module.
|
You can use a Filter to analyze only the monitor records that meet your criteria for a traceability field, corrective action, bypass, date/time, or standard. You can also use a Filter to sort data in order by a value other than the date/time stamp.
Filters are stored in the program and can be used again to analyze data without having to create a new filter each time. They can also be edited and deleted.
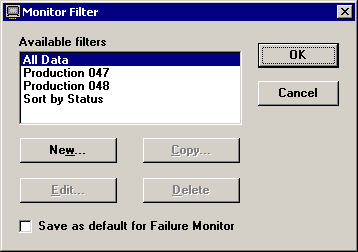
To set or clear a filter for the current monitor window, click the Options menu (or Opts in on very small displays) and then click Filter. This will display the Monitor Filter screen:
|

|
|
The normal Monitor Filter screen.
|
|

|
|
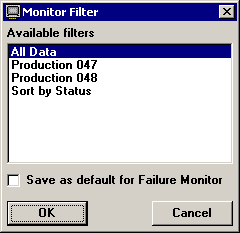
The Monitor Filter screen in PDA mode at 240 by 240 pixels.
|
|
|
|
To
|
Do this
|
|
Turn on a filter
|
Select the filter name in the Available filters list, and then click OK.
|
|
Turn off a filter
|
Select the filter named All Data in the Available filters list, and then click OK.
|
|
Create a new filter
|
-
Click New.
-
On the Traceability Filter screen, enter a unique name for this filter, up to 40 characters long. Use names that describe what the filter does. Such names will be especially useful if you need to include the filter name on a report.
Tip: To see the names of existing filters, click the arrow at the end of the Filter Name box.
-
See Setting the contents of a filter for help setting up the contents of the filter.
(In PDA mode on very small displays, the New button is not available. To create a new filter, perform these steps when running GainSeeker in normal mode.)
|
|
Create a new filter
based on the contents
of an existing filter
|
-
Click the name of the existing filter in the Available filters list.
-
Click Copy.
-
On the Traceability Filter screen, enter a unique name for this filter, up to 40 characters long. Use names that describe what the filter does. Such names will be especially useful if you need to include the filter name on a report.
Tip: To see the names of existing filters, click the arrow at the end of the Filter Name box.
-
See Setting the contents of a filter for help setting up the contents of the filter.
(In PDA mode on very small displays, the Copy button is not available. To copy a filter, perform these steps when running GainSeeker in normal mode.)
|
|
View or change the
contents of a filter
|
-
Click the name of the filter in the Available filters list.
-
Click Edit. (In PDA mode on very small displays, this button is not available.)
-
See Setting the contents of a filter for help setting up the contents of the filter.
(In PDA mode on very small displays, the Edit button is not available. To edit a filter, perform these steps when running GainSeeker in normal mode.)
|
|
Delete a filter
|
-
Click the name of the existing filter in the Available filters list.
-
Click Delete. (In PDA mode on very small displays, this button is not available.)
-
At the prompt to delete, click Yes.
(In PDA mode on very small displays, the Delete button is not available. To delete a filter, perform these steps when running GainSeeker in normal mode.)
|
|
Make this the default filter for the current Monitor window on this workstation
|
Select the Save as default for Monitor window check box.
|
|
 Note: Do not use “Quick Filter” as the name of your filter. Creating a filter with this name may produce unintended results. Note: Do not use “Quick Filter” as the name of your filter. Creating a filter with this name may produce unintended results.
|
After making your selections, click OK to apply your changes or Cancel to undo your changes.
More:
Setting the contents of a filter
Choosing which monitor records to display
Customizing how monitor records are displayed
 Note: This topic contains information about the legacy SPC Database Monitor module, which is being phased out from GainSeeker Suite. It is still available for use, but is being replaced by the Monitor Table chart window in the newer GainSeeker Charts module.