Launching GainSeeker modules from the .Launch module
Introduction to the .Launch module
You can use the .Launch module to:
Configuring and deploying the .Launch module
Logging in to configure the .Launch module
Start the .Launch module from the Windows Start menu or create a shortcut for the .Launch module.
You can use one of the following methods for logging in to configure the .Launch module:
-
-
Configure .Launch settings for the current GainSeeker user
This method works well if the role for the GainSeeker user for whom you are configuring the .Launch settings has Change and Edit Rights \ .Launch settings enabled.
-
Make sure that no other workstations are currently logged in to the .Launch module as the GainSeeker user for whom you are configuring the .Launch settings.
-
Log in to the .Launch module as the GainSeeker user for whom you are configuring the .Launch settings.
If a login password is set for this user, you may need to ask this user to enter their password.
-
-
Configure .Launch settings for another GainSeeker user
This method works well if the role for the GainSeeker user for whom you are configuring the .Launch settings does not have Change and Edit Rights \ .Launch settings enabled.
-
Make sure that no other workstations are currently logged in to the .Launch module as the GainSeeker user for whom you are configuring the .Launch settings.
-
Log in to the .Launch module as any user that is assigned to a role with the following rights enabled:
-
Change and Edit Rights \ .Launch settings
-
Module Access \ Administration
-
Miscellaneous \ See all users, roles and configurations
-
Click the File menu and then click Edit Another User. This will display a message like the following:

-
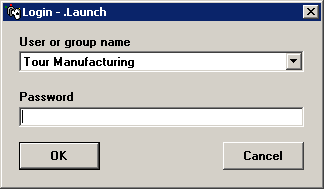
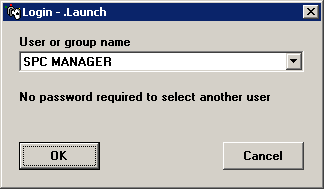
Click OK on the message window. Now the Login window is displayed:
-
Click the User or group name list, select the user for whom you are configuring the .Launch settings, and then click OK.
This will log you in to the .Launch module as the selected user with the rights listed above temporarily enabled.
-
Configure the .Launch settings for the selected user.
-
When finished configuring .Launch settings for the selected user, you should close the .Launch module or repeat step 3 to edit another user.
-
-
Configure .Launch settings for the current GainSeeker user and copy them to other users
This method works well if you are configuring .Launch settings for multiple GainSeeker users who do not yet have any .Launch settings configured.
|
 Note: This method will completely overwrite all of the .Launch settings – shortcuts, groups and other .Launch properties – for the users to whom you copy your settings. Note: This method will completely overwrite all of the .Launch settings – shortcuts, groups and other .Launch properties – for the users to whom you copy your settings.
It will also configure the .Launch settings for the User or group name you use to log in to the .Launch module.
|
-
Make sure that no other workstations are currently logged in to the .Launch module as the GainSeeker users for whom you are configuring the .Launch settings.
-
Use either method listed above – Configure .Launch settings for the current GainSeeker user or Configure .Launch settings for another GainSeeker user – to log in as the user whose .Launch settings you want to configure and then copy to other users.
-
Configure the .Launch settings for this user.
-
After configuring all of the shortcuts, groups and other .Launch properties for this user:
-
Click the File menu and then click Copy to Other Users.
-
Select one or more users you want to configure, and then click OK.
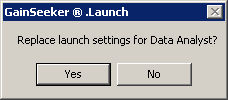
If .Launch settings have already been configured for a user, GainSeeker will display a window like this to make sure you really want to overwrite their existing .Launch settings:
-
-
Export and import .Launch settings
This method works well if you need to export .Launch settings from one system and then import them into another. If you only need to copy settings from one user to another on your system, you should use the instructions for copying .Launch settings to other users.
To export .Launch settings:
-
Log in to the .Launch module as a user with rights to export settings.
-
Click the File menu and then click Export Settings.
-
Select the user whose settings you want to export, and then click OK.
-
Browse to the folder where you want to create the export file, enter a name for the export file, and then click Save.
To import .Launch settings:
|
 Note: These steps will completely overwrite all of the .Launch settings – shortcuts, groups and other .Launch properties – for the users to whom you import settings. Note: These steps will completely overwrite all of the .Launch settings – shortcuts, groups and other .Launch properties – for the users to whom you import settings.
|
-
Make sure that no other workstations are currently logged in to the .Launch module as the GainSeeker user for whom you are importing .Launch settings.
-
Log in to the .Launch module as a user with rights to import settings.
-
Click the File menu and then click Import Settings.
-
Browse to the folder that contains the .Launch settings file (*.dlx) that you want to import.
Click the file to import, and then click Open.
-
Select the user for which you want to import these settings, and then click OK.
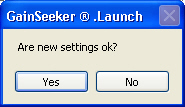
Click Yes to keep the new settings you have imported or No to revert to your previous .Launch settings.
Saving changes to .Launch settings
GainSeeker will automatically save your changes when you add or edit shortcuts, groups and other .Launch properties.
Working with shortcut groups
You can use Groups to organize short, manageable lists of related shortcuts.
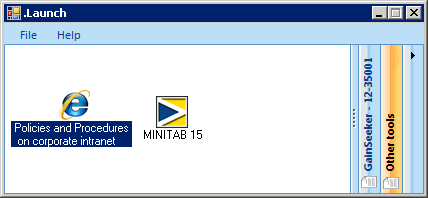
For example, the .Launch screen below has been configured with a group for each of three part numbers (12-35001, 13-00165 and 14-27414) and a fourth group for other tools:
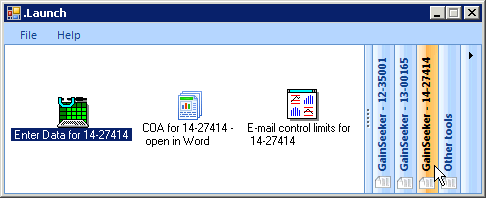
If the current size of the .Launch screen cannot display the full names of all groups, the groups will be minimized to icons like the example below. One or more groups may also be minimized to icons if you slide the separator bar or click the  button to show fewer buttons.

By default, the .Launch module will display a single Programs group to which you can add shortcuts.
Adding a new group
-
Click the File menu and then click New Group.
-
Type a name for the new group, and then click OK.
Renaming a group
-
Click on the group you want to rename.
-
Click the File menu, point to Edit Group, and then click Rename.
-
Type a name for the new group, and then click OK.
Changing the order in which groups appear
-
Click on the group that you want to move.
-
If the .Launch module is configured for horizontal orientation: click the File menu, point to Edit Group, and then click Move Left or Move Right.
If the .Launch module is configured for vertical orientation: click the File menu, point to Edit Group, and then click Move Up or Move Down.
Deleting a group
-
Click on the group that you want to delete.
-
Click the File menu and then click Remove Group.
-
When prompted to delete the group, click OK.
Working with shortcuts
Adding a new shortcut for a GainSeeker module
-
Click the group where you want the new shortcut to appear.
-
Click the File menu and then click New GainSeeker Item.
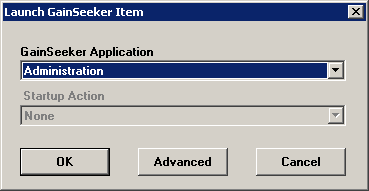
This will display the Launch GainSeeker Item screen:
-
Click the GainSeeker Application list and choose the GainSeeker module for which you want to create a shortcut.
-
Click the Startup Action list (if available) and choose the type of action that you will want this shortcut to automatically perform.
-
(optional) If you want this shortcut to log in to this GainSeeker module as a different user, log in to a different configuration and/or log in using different database connection information, click Advanced and choose the desired options.
-
Click OK to continue. This will display the GainSeeker Item Settings screen:
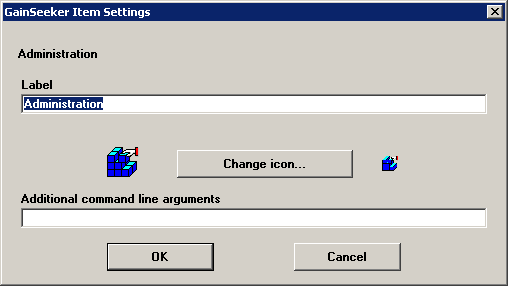
The options available on this screen will vary based on the GainSeeker Application and Startup Action you selected on the previous screen.
If you specified any Advanced options on the previous screen, the resulting command line parameters for those options will be displayed in the upper right corner of this screen. Also, any lists of items (standards, processes, data entry templates, etc.) shown on this screen are based on the Advanced options you selected.
-
To change the text that will be displayed on this shortcut, enter the desired text in the Label box.
If you want this shortcut to display just the icon with no text label, delete all text from the Label box.
-
To change the icon that will be displayed on this shortcut:
-
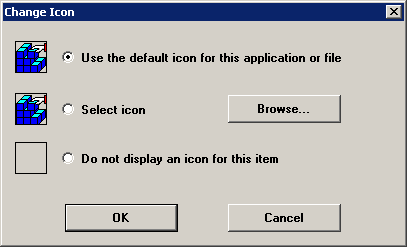
Click Change icon. This will display the Change Icon screen:
-
Choose an option from the Change Icon screen and then click OK.
-
If you selected a Startup Action on the previous screen, configure the settings for that action.
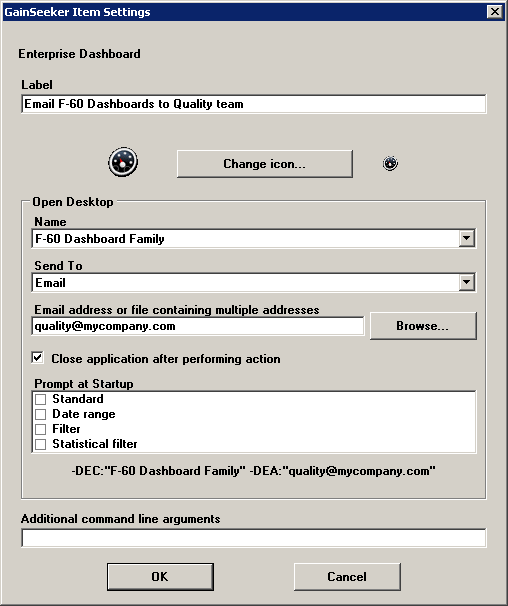
The options available on this screen will vary based on the GainSeeker Application and Startup Action you selected on the previous screen.
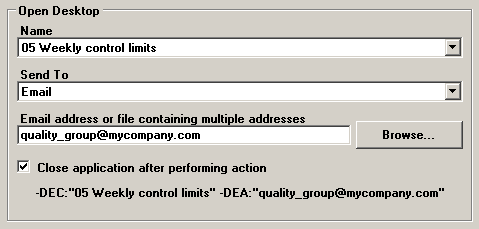
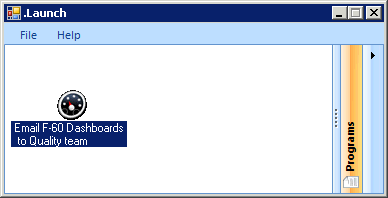
As you configure the options for the Startup Action you selected, the resulting command line parameters will be displayed at the bottom of this area. For example: in the picture above, an Enterprise Dashboard shortcut to open the desktop named "F-60 Dashboard Family", e-mail it to "quality@mycompany.com" and then close the Enterprise Dashboard module will automatically add -DEC:"F-60 Dashboard Family" -DEA:"quality@mycompany.com" to the command line for this shortcut.
For more information on configuring the options available for startup actions, see Setting up shortcuts for automatic functions.
-
If you want to specify additional command line parameters that are valid for this GainSeeker module but not displayed on this screen, enter them in the Additional command line arguments box. For more information, see Setting up shortcuts for automatic functions.
-
Click OK to finish adding this shortcut to the selected group.
Adding a new shortcut for another program, file or web address
-
Click the group where you want the new shortcut to appear.
-
Click the File menu and then click New Item.
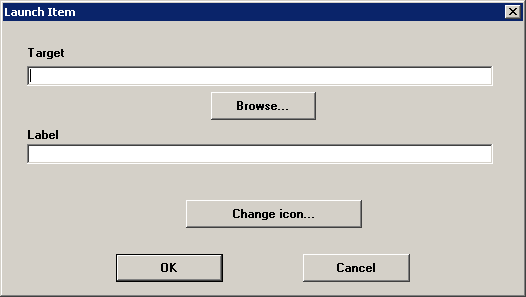
This will display the Launch Item screen:
-
In the Target box, enter the name and location of the program, file or web address that you want this shortcut to launch. If desired, you may click Browse to locate the program or file.
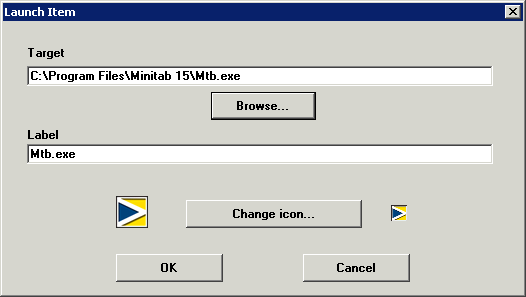
In the Target box, you can also specify command line parameters for the program or file (if needed).
-
To change the text that will be displayed on this shortcut, enter the desired text in the Label box.
If you want this shortcut to display just the icon with no text label, delete all text from the Label box.
-
To change the icon that will be displayed on this shortcut:
-
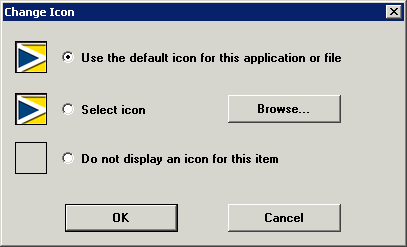
Click Change icon. This will display the Change Icon screen:
-
Choose an option from the Change Icon screen and then click OK.
-
Click OK to finish adding this shortcut to the selected group.
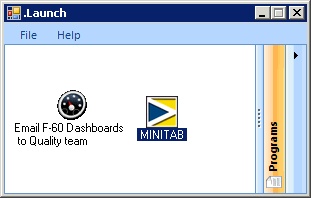
Changing a shortcut
To change the settings for a shortcut, right-click the shortcut and then click Settings. Alternately, you may click the File menu, point to Edit Item and then click Settings to change the settings for the currently highlighted shortcut.
When changing the shortcut for a GainSeeker module, you can only change the information on the GainSeeker Item Settings screen. If you need to specify different information from the Launch GainSeeker Item screen - such as the Startup Action or Advanced properties - you must create a new shortcut with the new settings.
Changing the order in which shortcuts appear
-
Right-click the shortcut that you want to move.
-
If the .Launch module is configured for horizontal orientation: click Move Left or Move Right.
If the .Launch module is configured for vertical orientation: click Move Up or Move Down.
Moving a shortcut to a different group
-
Right-click the shortcut that you want to move to a different group, and then click Change Group.
-
Select the new group for this icon, and then click OK.
Deleting a shortcut
Right-click the shortcut that you want to delete, and then click Remove Item.
Working with other .Launch window properties
Displaying small icons or large icons
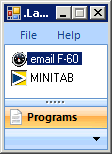
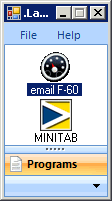
To display smaller icons on the .Launch window: click the File menu, point to Icon Size and then click Small.
To display larger icons on the .Launch window (the default setting): click the File menu, point to Icon Size and then click Large.
|
|
|
|
Small
|
Large
|
Docking the .Launch window on your screen
You can dock the .Launch window along one edge of your screen.
To do so: click the File menu, point to Dock and then click Left, Right, Top or Bottom.
-
If you dock the .Launch window on the Left or Right edge of your screen, the orientation of the window will automatically be set to vertical, and the height of the window will automatically be expanded to the height of your screen.
-
If you dock the .Launch window on the Top or Bottom of your screen, the orientation of the window will automatically be set to horizontal, and the width of the window will automatically be expanded to the width of your screen.
If you run GainSeeker on a computer with more than one monitor, the .Launch window will be docked on your primary monitor only.
Manually setting the orientation, size and position of the .Launch window
These options will work best if the Dock option is set to None.
Configuring .Launch for horizontal or vertical orientation
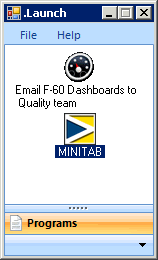
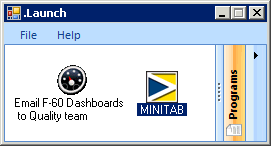
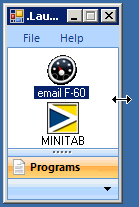
The .Launch module can be displayed in horizontal or vertical orientation, like the following examples:
|
|
|
|
Vertical
|
Horizontal
|
To change the orientation of the .Launch window: click the File menu, point to Orientation and then click Vertical or Horizontal.
After changing the orientation, you may want to change the size of the .Launch window (below).
Changing the size and position of the .Launch window
You can click and drag any of the edges or corners of the .Launch window to adjust its size.
You can also drag the .Launch window to any location on your screen.
|
 Note: The settings for the size and position of the .Launch window will only be used by the computer where you are working, and they will be applied for all GainSeeker users who run the .Launch module on this computer. These settings are not stored on the network with the other .Launch settings. Note: The settings for the size and position of the .Launch window will only be used by the computer where you are working, and they will be applied for all GainSeeker users who run the .Launch module on this computer. These settings are not stored on the network with the other .Launch settings.
|
Using the .Launch module to launch a GainSeeker module or other program
-
Start the .Launch module and log in (if needed).
-
If you don't see the shortcut you want to launch, click the Group that contains the shortcut you need.

-
Double-click the shortcut you want to launch.
Alternately, you may press the arrow keys to highlight the desired shortcut and then press the ENTER key.
