 Fig. 2
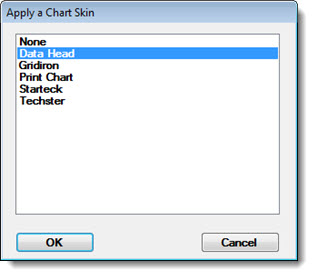
The GainSeeker Charts module features multiple options for versatile dashboard design—many that were developed specifically for GainSeeker Suite users.
Some of the settings for dashboard controls may be familiar to most users and not require additional explanation. Some of the newer property features that are common to some of the controls are featured here. For additional information, refer to specific dashboard control topics.
|
Contents [Hide] |
When creating a new SPC chart window or a new DMS chart window, you can save your favorite display options as a Chart Skin that you can quickly apply to charts and tables. GainSeeker also includes ready-to-apply Chart Skins.
While a chart skin can make analyzing data more visually engaging, it also has practical applications. All settings in the Charts Overrides node of the charts Settings dialog in the GainSeeker Charts module can be saved as a DMS or SPC skin, including which limits to display and how data is scaled.
A Chart Skin allows you to set multiple display settings and save them as a Chart Skin you name. Here are a few of the multiple settings you can change:
Patterns, colors, fonts, and font sizes for charts and tables
The three chart titles that display at the top of the chart
How data is scaled on the chart
A background image on the chart
Size, shape, and colors for markers that display on charts; markers are unique shapes with unique colors that flag specific events on charts such as an out-of-control data point or an operator note.
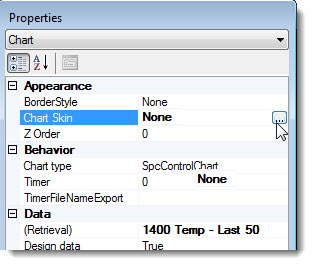
To Edit the property:
In the Apply a Chart Skin dialog that opens, click the Chart Skin name you want to apply to the chart (Fig. 2).
Fig. 1 Fig. 2
The skin you selected displays on the chart in dashboard design mode (Fig. 3). To select a different chart skin for the chart, repeat steps 1. and 2. above.
To create a new chart skin that will add to the list of available chart skins, see Chart Skins
Fig. 3
You can use the Z-Order property to specify the order in which dashboard controls display when objects overlap and when they are saved as .rtf files (such as when sending to Word or WordPad).
The default Z-Order for a dashboard control is the number 0.
Enter a number to specify the order you want for that control in relation to other controls on the same dashboard. A control with a higher Z-Order will be displayed and exported above a control with a lower Z-Order.
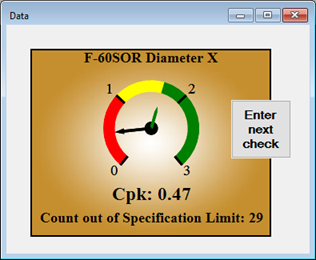
In this example dashboard, the Z-Order for the Dial gage was left at 0 while the Z-Order for the Button was set to 1. This ensures that the Button will overlap the Dial gage.
A dashboard control can be set to automatically refresh and display the latest data—any time its host dashboard window is open.
There are two ways a dashboard control can be refreshed user the Timer property:
Refresh along with the dashboard window, using the user-set time interval for the dashboard window. This option is selected on the Dashboard Designer menu in the Properties dialog. If you choose this setting, the dashboard control Timer value setting on the Properties dialog menu for that control should remain set at 0.
To set the Timer for a dashboard control:
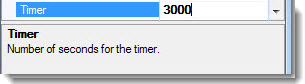
Click in the property cell opposite the Timer property name in the Properties dialog box.
Enter the numeric value for which you want the dashboard control to refresh, using seconds as the time increment.
To remove the Timer value setting for a control, select the numeric value in the cell and delete it. Then, enter 0 in the property cell using your keyboard.
|
The TimerFileNameExport property automatically takes a screen capture (or "snapshot") image of a dashboard window (or individual control) after it refreshes at the user-defined Timer refresh setting, then exports the image to a user-specified file. After each refresh session, the file will update (overwrite) with the latest image as long as the dashboard (or with a control—as long as the dashboard to which it is assigned) is open.
To set the TimerFileNameExport property:
The Save As dialog box will open:
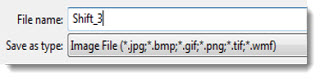
To cancel the TimerFileNameExport setting, select the file name in the value field and delete it.
|
When a dashboard is open in design/edit mode, any dashboard controls automatically display DesignData (fictitious data) instead of actual data. This default setting can help conserve the time it may take to retrieve and calculate lengthy data for some of the dashboard controls.
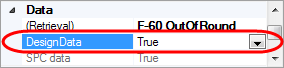
DesignData is used for the controls when the DesignData property under the Data category displays the word True.
Select False in the DesignData property value cell to temporarily set the controls to display actual data for a single session of the dashboard open in design/edit mode. The actual retrieval may take longer, but it can make it easier to fine-tune the controls' properties while they are being designed.
The False (actual data) mode only applies for a single design/edit session of the dashboard window, so when the dashboard is reopened in design/edit mode at a later time, DesignData (True) will again be displayed.
This property allows you to anchor a dashboard control at specific regions on the dashboard window. When the window is resized, the control maintains the position to which it is anchored.
This property allows you to dock a dashboard control and autosize the control at a specific location on the dashboard window.
The AutoGrow property in the Properties dialog can be set to True or False. It will be ignored if the AutoSize property is set to False.
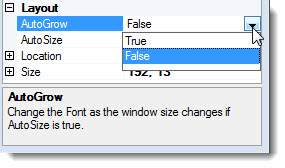
True mode enables automatic resizing of the dashboard control and any text it contains when the dashboard window frame is made larger or smaller in run mode (not design/edit mode).
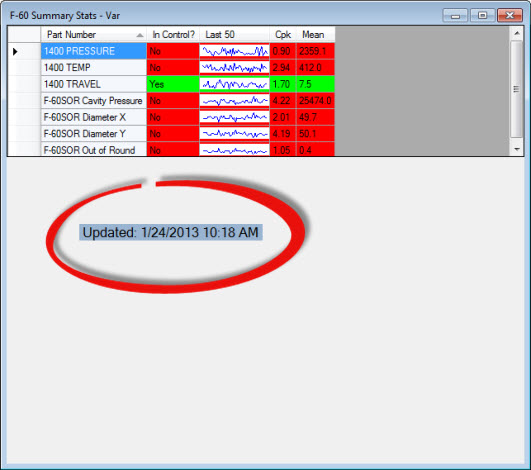
In Fig. 1 below, the dashboard window frame is clicked and dragged to increase the size of the window. Fig. 2 illustrates the relative size increase of the DateTime control (circled in red) after the dashboard window size is increased. If the dashboard window is decreased, the DateTime control will also decrease its relative size.
Fig. 1
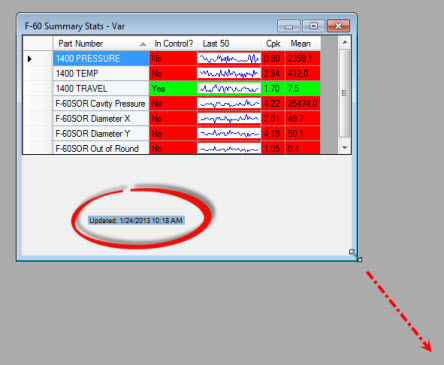
Fig. 2
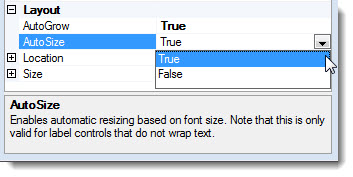
The AutoSize property in the Properties dialog box can be set to True or False.
True mode enables automatic resizing of the dashboard control based on the font size. False mode enables the user to adjust the size of the control.
For more information about timers, see Refreshing a Dashboard, Designing the dashboard window, Opening dashboard windows, Switching dashboards between run and design/edit mode