Changing file paths
When changing file paths, you can specify:
- a folder that already contains SPC or DMS files
- a folder that does not yet contain them, or
- a folder that you plan to create (which does not yet exist).
 Certain groups of GainSeeker tables depend on the corresponding file path to be unique to that version of the GainSeeker tables, so be cautious when using this feature. For example - each SPC data filter is actually a flat file in the SPC Data folder. If two configurations specify different names for the SPC Filter table but point to the same SPC Data folder, one configuration could overwrite or delete a flat file that the other configuratoin also uses, and this can generate error messages for the other configuration. Similarly, if two configurations specify the same names for a group of tables, then they should also point to the same folder(s) for that group of tables. For a list of table groups and file paths that must be modified together, see Tables and Files Used in GainSeeker 8.
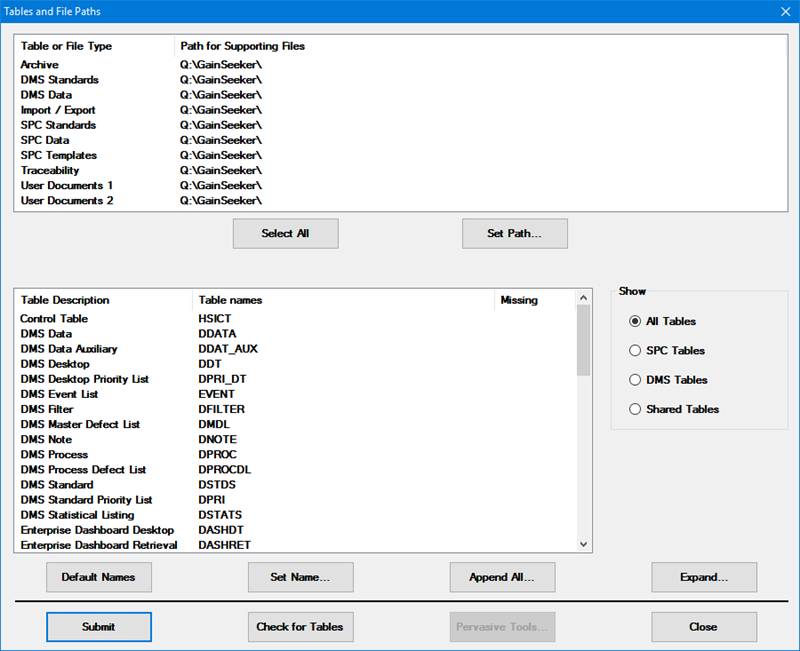
The Tables and Files Paths window is used to change file paths.
-
In the Table or File Type list, select one or more items for which you want to change the file path. Traceability, User Documents, Import/Export, and Archive paths are shared by SPC and DMS. For a list of the files accessed in each file path, see Tables and Files Used in GainSeeker 8.
|
To
|
Do this
|
|
Select consecutive items
|
-
Click on the first item you want to select.
-
Press and hold the SHIFT key.
-
Click on the last item you want to select.
|
|
Select nonconsecutive items
|
-
Click on the first item you want to select.
-
Press and hold the CTRL key.
-
Click on the other items you want to select.
|
|
Select all items
|
Click Select All.
|
-
Click Set Path... .
-
The Select File Path dialog opens.
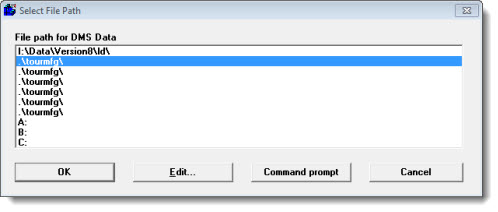
 The first file path in the list and A:, B:, and C: cannot be edited.
-
There are two ways to set the file path for the items you selected:
-
In the File path for [name] list on the Select File Path dialog, click a file path.
-
Click on a blank file path or on a defined path no longer in use, and then click Edit. The Edit File Path dialog displays.

Then, type the file path you want to use, or click Browse to search through existing folders. Please note the following:
-
If you are specifying a subfolder of the first file path in the list, the best practice is to use a relative path to specify the location of the new folder.
To use a relative path, type ".\" to specify the first file path in the list, and then type the name of the subfolder. For example, if the first file path in the list is F:\Gainseek\Data\, then the path .\Data002\ is the same as F:\Gainseek\Data\Data002\.
-
If you need to enter a full path, you can begin with either a drive letter or a UNC path. For example, if the F: drive actually maps to \\Server\Quality\ , then the file path F:\Gainseek\Data\Data002\ will point to the same folder as the file path \\Server\Quality\Gainseek\Data\Data002\ .
 To use GS Analyze or GainSeeker Mobile Web Service, you must set each file path to either a relative path or a UNC path. The web server must be able to access GainSeeker data without using any mapped network drives.
-
-
The file path you specify may not contain a space.
If you click Browse and select a file path that contains a space, GainSeeker will try to detect the equivalent "short name" file path (which does not contain spaces) from the file system. If detected, GainSeeker will paste this "short name" file path onto the Edit File Path screen. Otherwise, you will need to enter a different file path which does not contain a space.
-
The maximum length of the file path is 64 characters.
-
If your network system supports long file names, you may specify a folder name longer than eight characters.
If you enter a file path that does not yet exist, or one that does not yet contain the necessary GainSeeker files, you can later click Check for Tables to run the Table Creation Utility (TC Utility). The TC Utility automatically creates the new file path and populates it with the necessary files. For a list of the files needed in each file path, see Tables and Files Used in GainSeeker 8.
-
Repeat steps 1–4 above to set any additional file paths for one or more items.
-
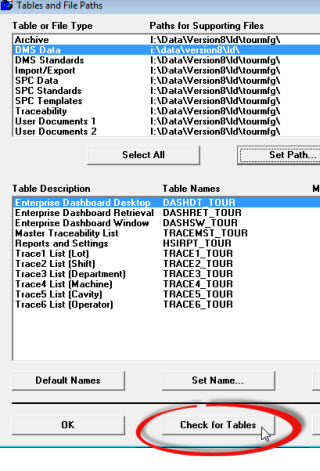
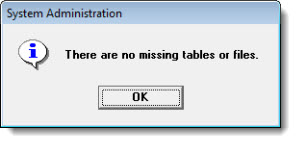
On the Tables and File Paths dialog, click Check for Tables to verify that the tables and file paths exist and that the necessary files exist in the specified paths.
-
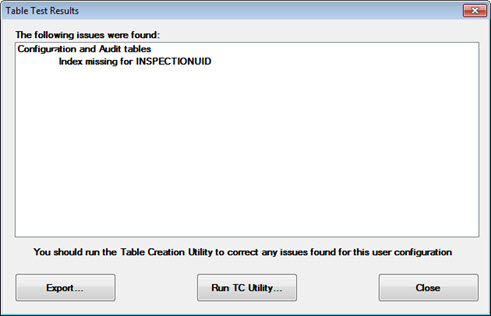
If the file path does not exist or if files or tables are missing, the Table Test Results dialog displays a message like the following. Click Run TC Utility to generate the missing folders, tables and/or files before continuing. For more information, see Table Creation Utility.
-
To finish making changes to tables and file paths, click OK on the Tables and File Paths dialog.
Related topics
Tables and File Paths
Changing table names
Accessing Pervasive Tools
 Certain groups of GainSeeker tables depend on the corresponding file path to be unique to that version of the GainSeeker tables, so be cautious when using this feature. For example - each SPC data filter is actually a flat file in the SPC Data folder. If two configurations specify different names for the SPC Filter table but point to the same SPC Data folder, one configuration could overwrite or delete a flat file that the other configuratoin also uses, and this can generate error messages for the other configuration. Similarly, if two configurations specify the same names for a group of tables, then they should also point to the same folder(s) for that group of tables. For a list of table groups and file paths that must be modified together, see Tables and Files Used in GainSeeker 8.


