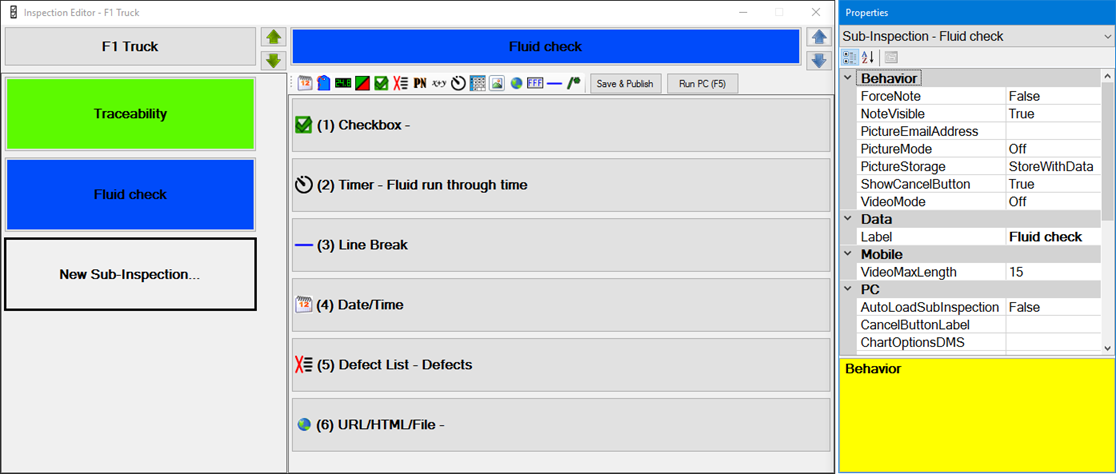
The Inspection Editor in the GainSeeker Inspections module is used to create and edit inspections for use with the GS Collect app for mobile device inspections and PC Collect inspections.
To open the Inspection Editor:
Launch the GainSeeker Inspections module.
Close any startup windows that may be displayed.
Click the Manage Inspections button, or click the File menu and then choose Manage Inspections.
For an overview of what is involved in creating an inspection, see Overview: Creating Inspections
For step by step instructions for creating an inspection, see Creating an inspection: Part 1
The Inspection Editor in the GainSeeker Inspections module is the tool you can use to create inspections.

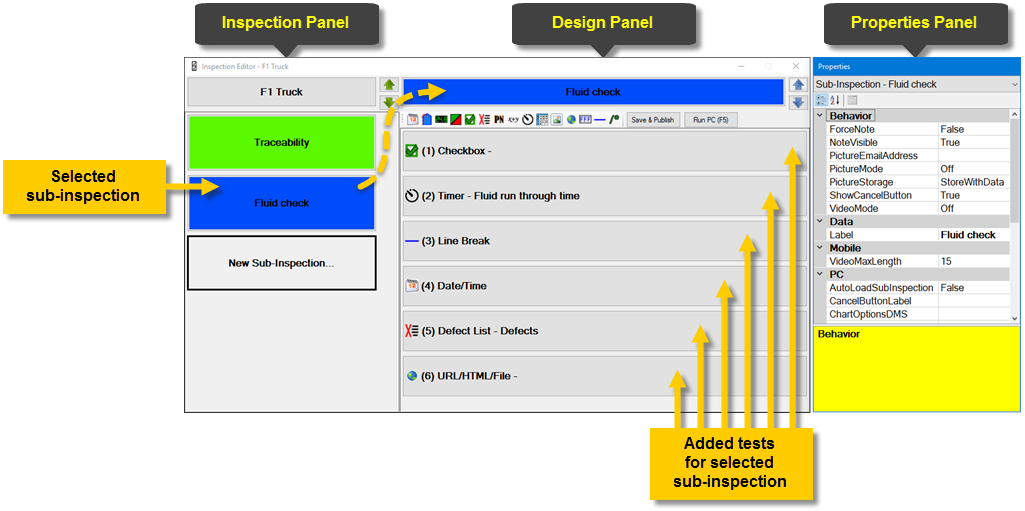
The Inspection Editor is comprised of three columnar panels: the Inspection panel (left), the Design panel (center), and the Properties panel (right). See the table below for information about how each can be used.

| The Inspection panel | The Properties panel | |
|
Contains: |
Contains: |
Contains: |
|
|
|
|
Use the Inspection panel to: |
Use the Design panel to: |
Use the Properties panel to: |
|
|
|
You can copy and paste a sub-inspection or a sub-inspection's tests within the same inspection or to a different inspection. Any property settings specific to that item are copied along with that item. See Copy and Paste.
 Note: After upgrading from a previous version of GainSeeker, editing an inspection and closing it without making any changes may still display a prompt that asks if you wish to save changes. This is expected behavior and occurs because of new inspection properties in the newer GainSeeker version.
For information about setting the properties for the inspections, see Inspection Properties