|
Contents [Hide] |

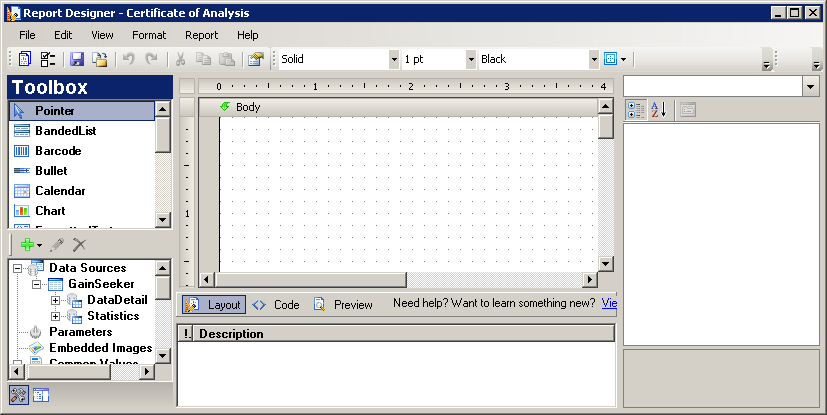
The Toolbox is displayed on the left side of the Report Designer window. It is divided into two parts—a list of report items and the data explorer.
The top half of the Toolbox displays a list of report items.
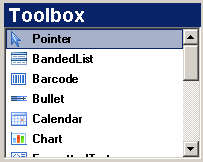
The highlighted item determines what will be added when you click on the layout area of the report. (The Pointer is not actually a report item; instead, it means that clicking on the layout area of the report will not add a new item to the report.) You can also drag and drop an item from this list onto the layout area of the report.
Some of these report items—Table, List, Banded List, Matrix, and Chart—are specially categorized as Data Regions. This means that they can contain other report items (including other data regions) to repeat for all rows of information in a single dataset.
|
|
|
|
The lower half of the Toolbox displays the Data Explorer.
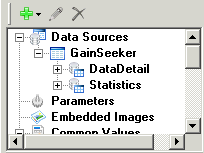
The Data Explorer contains four basic categories of information that can be used on your report:
GainSeeker automatically creates the GainSeeker data source for you. Depending on the type of report and the Retrieval Settings you specified for this dynamic report, GainSeeker will also provide one or more datasets for the values that GainSeeker will provide to the report:
If you selected one or more Columns for the report, these will be available in the DataDetail dataset. For an Advanced report, the contents of the DataDetail dataset will depend on SQL statement you provided for the report.
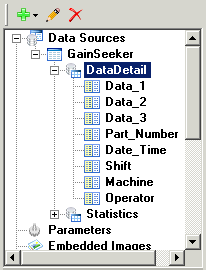
If you selected one or more Statistics for the report, these will be available in the DataDetail dataset, the Statistics dataset, or both, depending on the Advanced option you selected for providing statistics to the report.
If you selected Pareto detail and/or DPU detail, another dataset will be added for each option you selected.
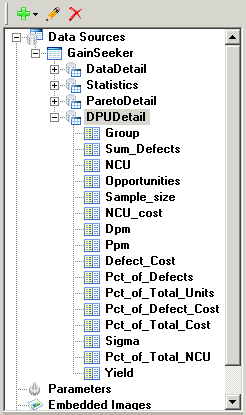
For a Mixed report, these datasets will be provided for each retrieval in the report.
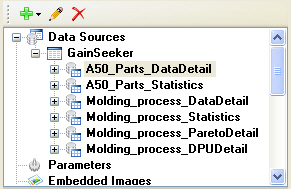
The example shown above is for a Mixed report that contains one SPC retrieval named "A-50 Parts" and one DMS retrieval named "Molding process".
|
Statistic: |
Data type: |
|
Row Number DMS Opportunities DMS Real-time failures SPC Real-time failures SPC Subgroup Size |
Integer |
|
DMS p DMS u DMS Trace Cost DMS OEE Available DMS OEE Scheduled DMS OEE Good DMS OEE Total DMS OEE Ideal DMS Sample Size DMS Sum Defects DMS NCU DMS NCU Cost DMS Defects SPC Data SPC X-bar SPC Range SPC Moving range SPC Sigma |
Double |
Most strings that contain only numbers will accept formatting for decimals simply by setting the Format property. If that does not function as desired, you can use functions like ToDouble() or ToInt32() in the Value property to return a numeric value that will accept numeric formatting.
Strings that contain date/time values will only accept other Format property if you first set their value using ToDateTime().
For example: The Date_Time value listed in the DataDetail dataset is recognized by this module as a string value instead of a true date/time value. If you need to change the format of these date/time stamps, you should: first change the Value property from =Fields!Date_Time.Value to =ToDateTime(Fields!Date_Time.Value) . Then you can change the Format property to one of the predefined format codes for dates and times or enter a custom format string (e.g., yy/MM/dd HH:mm:ss). For more information on custom format strings, see the Microsoft Developer Network website.
To retrieve information from sources outside of the GainSeeker database, you can define another Data Source and dataset.
|
|
You can use parameters to filter the information displayed in reports. For more information, see Parameters.
You can import an image file into your report as an embedded image which can be displayed by the "image" report item. For more information, see Embedded images.
These are values that are commonly displayed on reports. For more information, see Global Collections.
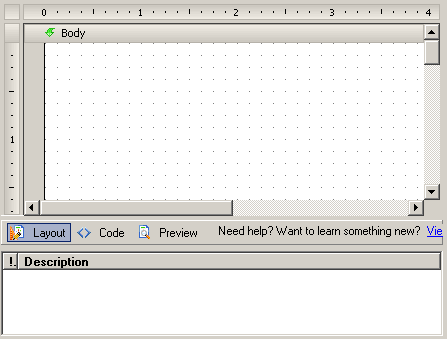
The Layout area is displayed in the center of the Report Designer window and allows you to work with the report layout, add custom code to the report, and preview the report. (Note: The link to screencasts is not functional.)
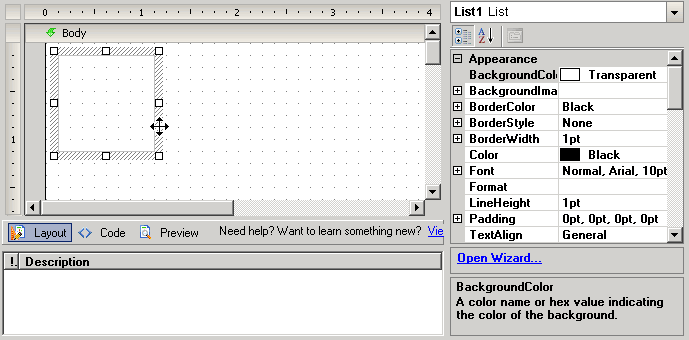
You can use the property grid to modify some of the contents and formatting of the selected report item on the layout area. You can also use it to modify properties of the report and the body of the report.
When the ![]() button is selected, you can:
button is selected, you can:
drag and drop items from the Toolbox onto the body of the report
move and re-size items on the body of the report
change the contents of an item on the report
click an item on the body of the report – or choose any item from the drop-down list above the property grid – and then use the property grid to change the properties of that item
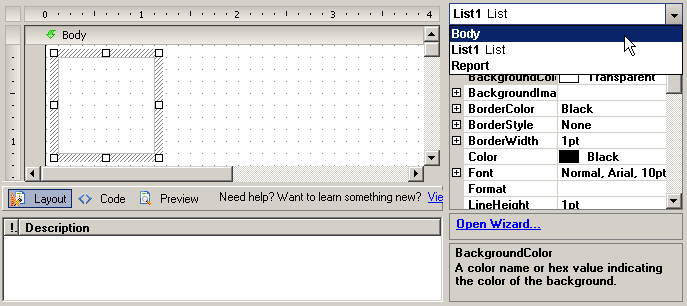
right-click an item on the body of the report and then click Properties, or choose any item from the drop-down list above the property grid and then click Open Wizard, to open the Smart Panel for that item:
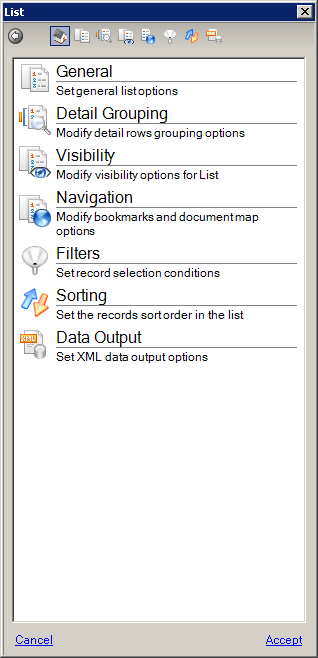
The Smart Panel for an item typically contains more options than the property grid for that item. For more information, see Smart Panel Guide.
To add custom code to your report, click the ![]() button. For more information, see Custom Code. You can also try the Custom code sample: use "number of decimals" to format numbers and the Custom code sample: count unique values.
button. For more information, see Custom Code. You can also try the Custom code sample: use "number of decimals" to format numbers and the Custom code sample: count unique values.
|
If you create or edit a dataset in order to add or change a field in that dataset, avoid using the these characters in the Name of any field. |
To quickly preview your report as you work, click the ![]() button.
button.
|
|
For more information, see Previewing.
At any time, you can save your changes to the report by clicking the ![]() button, clicking the File menu and then clicking Save Report, or pressing CTRL+S.
button, clicking the File menu and then clicking Save Report, or pressing CTRL+S.
To view the report, click the ![]() button or click the File menu and then click View Report. For information on viewing reports, see Viewing and Sending Dynamic Reports.
button or click the File menu and then click View Report. For information on viewing reports, see Viewing and Sending Dynamic Reports.
To change the retrieval settings for the report, click the ![]() button or click the File menu and then click Retrieval Settings. For information on configuring the retrieval settings, see Defining Retrieval Settings for a Dynamic Report.
button or click the File menu and then click Retrieval Settings. For information on configuring the retrieval settings, see Defining Retrieval Settings for a Dynamic Report.
For in-depth documentation of the features in the Report Designer, see Data Dynamics Reports Designer Documentation. To install the Samples and Walkthroughs that are referenced by this documentation, see \Sample Reports\HowTo.txt on the GainSeeker installation CD.
You may also want to try the Tutorial - Certificate of Analysis.