 Date/Time
This topic applies to the GainSeeker Inspections module. It features sub-inspection tests that may not require a lot of explanation.
This topic includes the following tests:
 Date/Time
 DMS Standard
 Text
Text
 Line Break
 Comments
This topic also includes the following buttons:
 Save & Publish
 Run PC
Note: Not all of the sub-inspection test toolbar buttons are technically "tests." For simplicity, that term is used to describe all of the sub-inspection test toolbar buttons.
|
Contents [Hide] |
Click a toolbar button to add that test to a sub-inspection.
After the test has been added to the sub-inspection, use the Properties panel to change any properties for this test.
|
Test Name |
Property and Category |
Property field |
Default setting or default display |
Allows |
|
Sets the date/time stamp that is stored with data. Defaults to the current date and time of the PC or mobile device, but may allow the data entry inspector to set a specific date (not recommended for mobile inspections). On PC, the date and time are formatted according to the Windows settings for Short Date and Short Time. To change the date and time format, see Changing the Date and Time format below. GainSeeker will store date/time stamps to the minute, second, or hundredth of second based on your Show time to configuration setting.
|
APPEARANCE |
|||
|
Label |
Text field |
Date/Time |
Change the display label for this test. |
|
|
PC |
||||
|
[PC only]
Note: All data for this sub-inspection and subsequent sub-inspections is stored using the date and time until it is overwritten by another Date/Time test. |
True/False |
False. Allows the inspector to select a date/time for the inspection. |
True. Sets the value to the current date and time when this sub-inspection opens. This value cannot be edited.
Note: Do not use a Date/Time test if you want all data to be stored using the date and time when the data is actually submitted by the inspector. |
|
|
TestID The TestID property is only used in Python scripts for PC Collect inspections. A unique TestID number is automatically assigned to each test in the inspection, but you can change this number to a more meaningful name. For more information, see About the TestID property |
||||
|
Associate a DMS standard with the sub-inspection data. |
DATA |
|||
|
DMSStandard |
[Ellipsis button] |
[blank]. The inspector is required to pick a DMS standard from a list at run-time. |
Choose the DMS standard for which data will be entered. If this property is left blank, the operator must pick from a list during data entry. |
|
|
PC |
||||
|
TestID The TestID property is only used in Python scripts for PC Collect inspections. A unique TestID number is automatically assigned to each test in the inspection, but you can change this number to a more meaningful name. For more information, see About the TestID property |
||||
|
Displays text such as operator instructions. |
APPEARANCE |
|||
|
Text field |
[blank] |
Enter text for the display label. (On mobile devices, this is limited to five lines of text.) |
||
|
TextAlign |
Multiple choice |
Center |
Align text Left, Center, or Right. |
|
|
PC |
||||
|
[PC only] |
Multiple choice |
InLine. Displays the message in the Inspection Viewer . |
Message displays the message text for the label in a pop-up window. |
|
|
TestID The TestID property is only used in Python scripts for PC Collect inspections. A unique TestID number is automatically assigned to each test in the inspection, but you can change this number to a more meaningful name. For more information, see About the TestID property |
||||
|
|
No properties available for this test |
|||
|
Lets you create notes about the inspection creation process that only display on the Inspection Editor, not on the running inspection. |
APPEARANCE |
|||
|
Comment |
Test field |
[blank] |
Enter notes about the inspection creation process. Notes will display only in the editor Design panel, not on the running inspection. |
|
|
PC |
||||
|
TestID The TestID property is only used in Python scripts for PC Collect inspections. A unique TestID number is automatically assigned to each test in the inspection, but you can change this number to a more meaningful name. For more information, see About the TestID property |
||||
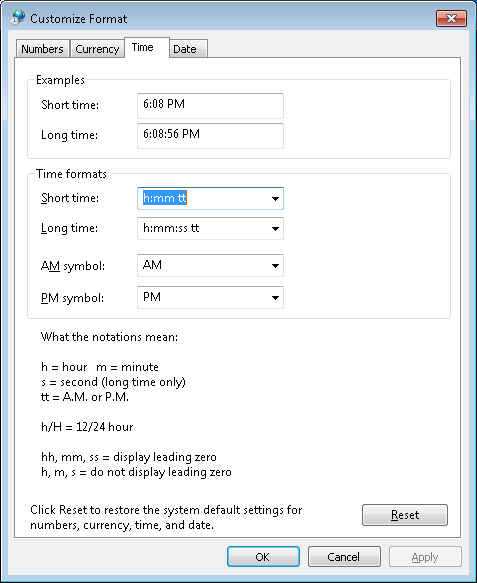
To change the Short Date and Short Time formats used by the Date/Time test, follow these steps (provided for Windows 10 and for Windows 7):
Go to Settings.
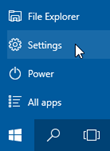
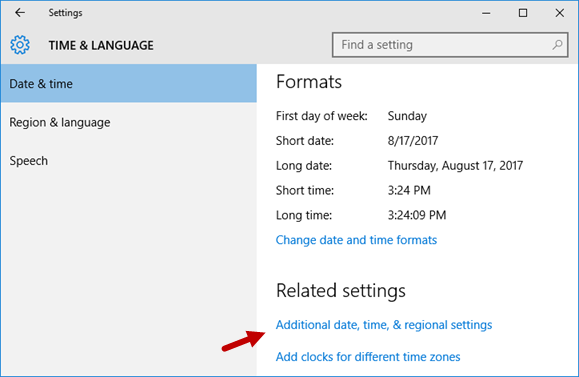
Click Time & Language.

Click Additional date, time, and regional settings.
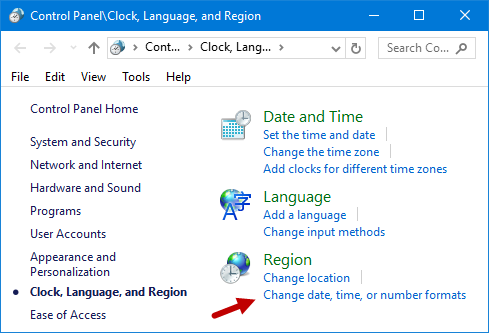
Click Change date, time, or number formats.
On the Formats tab, choose a different format for the Short date and/or Short time. Then click OK.
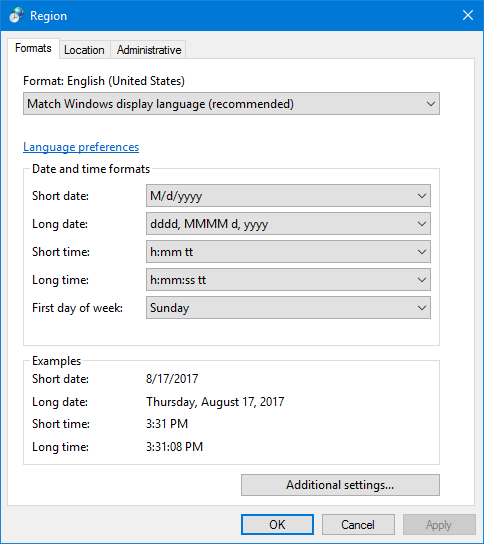
If the list does not contain the format you want, you can add it:
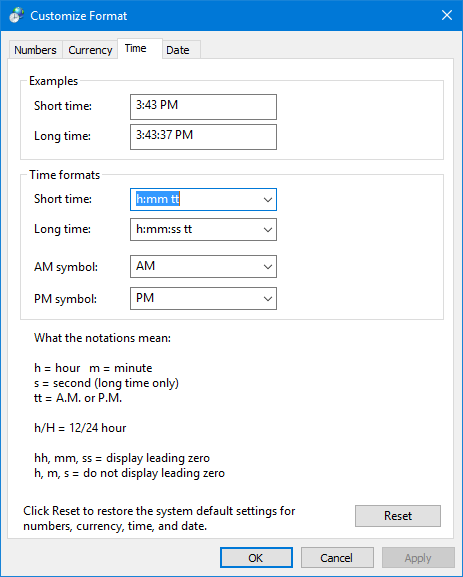
At the bottom of the Formats tab, click the Additional settings button.
On the Time tab and/or the Date tab, enter the format you want to use. Then click OK.
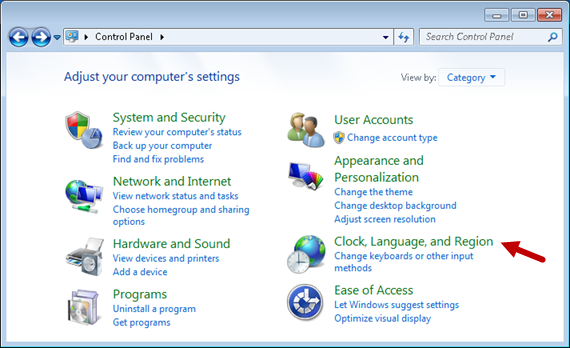
Go to Control Panel.
Ensure that View by is set to Category, and then click Clock, Language and Region.
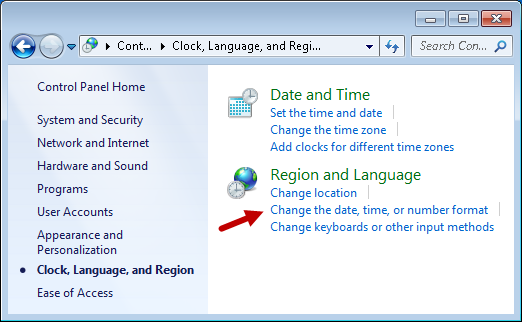
Click Change the date, time, or number format.
On the Formats tab, choose a different format for the Short date and/or Short time. Then click OK.
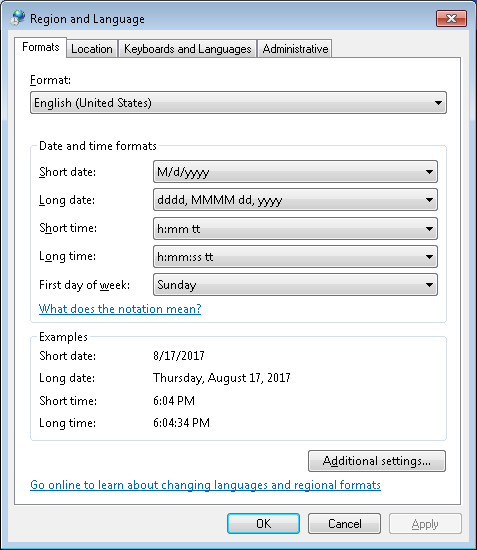
If the list does not contain the format you want, you can add it:
At the bottom of the Formats tab, click the Additional settings button.
On the Time tab and/or the Date tab, enter the format you want to use. Then click OK.
OnChange can be used to execute a formula for a specific test when certain conditions are met for the test in a running inspection. This works in conjunction with the Formula test. Python script is used to execute a formula for a PC Collect inspection. LiveCode code is used to execute a formula for a GS Collect inspection.
A formula can be executed for the following tests described in this topic:
Date/Time
DMS Standard
See the OnChange topic for specifics about conditions that trigger the execution for these and other tests in a sub-inspection.
The Save & Publish toolbar button saves changes to the inspection, publishes the inspection, and leaves the Inspection Editor open.
The Run PC toolbar button runs the inspection as it would appear in the PC Collect module. You can use this to run an inspection - or a newer version of an inspection - before you publish it for data entry.